# Introduction
What exactly is Eloria?
Eloria is a Global-Evolution server packed with custom stuff: new items, spells, monsters, maps, systems and other unique game mechanics.\
\
Below there's a small teaser what's present on our server.
{% embed url="" %}
***
# Thais custom Map
We are proud to present you the custom Thais map created specially for Eloria OTS.
Thais Depot - level 0
Map Legend
1 - NPC Mirabella (Rings, Amulets, Training Weapons, Distance equipment)
2 - NPC Rashid (Loot buyer)
3 - Loot Reward Chest (Trade your Loot Points for Reward Tokens and extra outfits & mounts)
4 - Training Monks
5 - Adventurer's Island (Exaltation Forge is available there)
6 - Arenas TP (Your first steps towards custom exp spots)
7 - Reward and Task Tokens Chests
8 - Hideout Entrance
9 - Dungeons Room Entrance
10 - NPC Naji (Banker)
11 - Imbuement Assitant (Buy your imbuing items here, Imbuement shrine is right on his left)
12 & 13- Exercise Weapon dummies
14 - Offline Training
15 - All teleports along Skill and Perk Statue
15 - Elden City - Boss Room - Skill and Perk Statue - Quests Room - Global Hunts teleports
***
Thais Depot - level 1
| Map Legend |
| :-----------------------------------------------------------------------------------------: |
| 1 - Boss Island (Elden Lord spawn when souls are collected, Boss Raids organized by Admins) |
| 2 - Exercise Weapon Dummy |
| 3 - Level reward chests (Free Wheel of Destiny scrolls) |
| 4 - Training Room (Dummy +30%, Entrance fee 100kk, You can xlog till the server save) |
| 5 - Museum with Eloria Items |
# Hunting Zones
## Global Hunts Room
| Map Legend |
| :--------------------------------------------------------------------------------------------------: |
| 1 - Lunar Mix Hunts (Mirandas / Spirit Jelly / Corrupted Diremaw/ Glinstone Warrior / Wraith Caller) |
| 2 - Eclipse Mix Hunts (Manyhands / Acrid / Charybdis / Glinstone Mage / Battlemage) |
| 3 - Lunar Mix \[2k] Hunts (Leaper / Blood Hawk) |
| 4 - Eclipse Mix \[2k] Hunts (Pindleskin / Lilith) |
| 5 - Lunar Lords Mix Hunts (Beastman of Azazula / Valiant Ghost) |
| 6 - Eclipse Lords Mix Hunts (Commoner / Twinsage Sorcerer) |
| 7 - Elder Hunts (Bayle / Elder Wyrm / Zorvath / One Eyed Giants / Vytherion) |
| 8 - Hunting Arenas (Paid exp after completing 50/50 monster arena) |
| 9 - Thais Temple Teleport |
| 10 - Arenas Teleport |
| 11 - Boss Room Teleport |
| 12 - Elden City Teleport |
# Elden City
### Elden City – The Heart of Modern Eloria
**Elden City** is the newest and most important hub on Eloria — a vast, reimagined capital built for adventurers who have surpassed their early journey and are ready to face new challenges.
It serves as the **central location** for daily missions, reputation farming, crafting, and accessing custom content.
Elden City
| Map Legend |
| :-----------------------------------------------------------------------: |
| 1 - Elden City Depot (Alchemist on 1st floor, Daily lottery on 2nd floor) |
| 2 - UE Upgrade altars |
| 3 - NPC Gravelbeard |
| 4 - NPC Salty Sam |
| 5 - NPC Perceptor ( 1st floor) |
***
#### Location & Purpose
Elden City is designed as a **mid–to–late game base of operations**.\
Here you’ll find everything you need to progress efficiently — from teleporters to new hunting zones, to NPCs offering missions, quests, and crafting opportunities.
Whether you’re looking to **earn reputation**, **farm tokens**, or **upgrade your gear**, this city is where your path continues.
Elden City DP
| Teleport/NPC | Description |
| ----------------------- | ---------------------------------------------------------------------------------------------------------------------------------------------------------------------------------------------------------------------------------- |
| NPC Ethereal Blacksmith | NPC which allows you to upgrade your equipment |
| ELDER ROOMS |
Reputation Hunting Grounds (You need to complete at least 10 level of every available arena)
It's live counter of Reputation Points gained by players. (Once it reaches 10000 - the ELDER boss will spawn on BOSS Island)
|
| ELDEN LEVELS |
Place where you can reborn your character. (Reborns can be done once you reach level 5000, reset your character to level 20, gain Elden Powers, be rewarded with most powerful items, or reset your character vocation.)
|
UE Upgrade altars on the left side of Elden City DP
# New Spells
### ✨ New Custom Spells (Level 300+)
Starting from **level 300**, every vocation on Eloria gains access to a **unique custom spell** — powerful single-target abilities designed for both **PvP and PvE** combat.
Each spell provides a distinct playstyle advantage, adding extra depth to your rotation and rewarding precision casting.\
Each one scales dynamically with your vocation’s level and magic level, ensuring smooth damage progression as you advance.
***
#### ⚔️ Knight – Astral Tear
A devastating long distance target strike infused with astral energy, perfect for quickly finishing off tough enemies or dealing strong burst damage in PvP.
***
#### 🌿 Druid – Nova Strike
Unleashes a concentrated surge of ice magic upon a single target. Excellent for sustained DPS and healing synergy in longer fights.
***
#### 🔥 Sorcerer – Abyssal Strike
Channels raw abyssal power into a single enemy, delivering massive energy damage. Ideal for executing high-level monsters and dominating duels.
***
#### 🏹 Paladin – Regalia Burst
A radiant holy projectile that pierces through darkness, delivering precise and powerful ranged damage. Perfect for consistent ranged burst attacks.
# Task System
## Eloria Task System
To access the Task system, go to the Task Board in Thais Temple or simply type `!task`. \
Hunt monsters to complete tasks and earn Reward Tokens and Hunting Task Tokens. Tasks are organized by monster type and hunting zone for easy navigation. The more tasks you finish, the more exclusive challenges you’ll unlock!
Task board available in Thais Temple
You can easily track your task kills by checking the Task Notification icon on the right side of your character display. It shows how many of each monster you’ve slain for your current task, and it updates dynamically—switch hunts, and it immediately reflects kills for the newly selected monsters.
Hybrid task system with Hunting Task (you can check the amount of owned HTP there )
Task Killed Counter icon
Besides the above option to verify how many of hunting task tokens you own, just use command **!htp.**
***
## Task Shop
In the Task Shop, you can spend your hard-earned Hunting Task Tokens on a variety of rewards—everything from Arena Tokens to exclusive outfits and more!
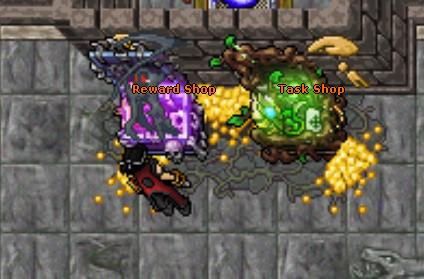
Reward and Task shop available in Thais dp
The most desired ones are:
* Gem Atelier & Wheel Scrolls\
\- Gem Atelier used for the Wheel Destiny, Wheel scrolls (one time use) to get additional Wheel points.
* Extra Items\
\- UE Upgrade potion (maxing out at 35)\
\- Explosion Gem (buff for UE Upgrade)\
\- Mobile Forge (to use the Exaltation Forge anywhere and anytime)\
\- Arena Tokens (to access Arenas which unlocks new custom spawns)
# Reward Tokens
## Reward Tokens - another Eloria's ingame currency
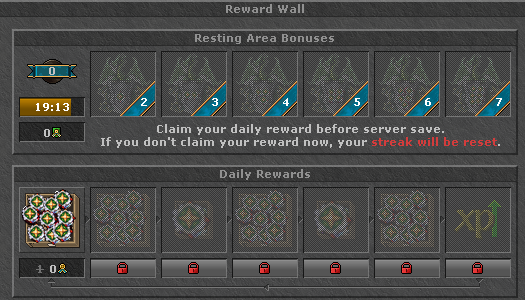
At every step of the game you’ll earn Reward Tokens. You can obtain them by defeating bosses, staying online, collecting daily rewards, winning events, completing quests, and much more.
| Reward Token shop | Custom daily Reward Shrine |
| ----------------------------------------------------------------------------------------------------------------------------------------------------------------------------------------------------------------------------------------------------------------------------------------- | ----------------------------------------------------------------------------------------------------------------------------------------------------------------------------------------------------------------------------------------------------------------------------------------- |
|
|
|
***
Reward Token
Each token you receive appears as shown in the image above. You must bind it to your character, and once it’s assigned, you’ll be able to purchase items.
The Reward Shop is constantly updated with new additions, below you can find the most desirable items:
* %Ultimate Spirit, %Ulitimate Mana, %Ultimate Health Potions\
\- These potions are usable above level 500 by RP, ED+MS, EK. Upgradable by Skill & Perk System
* Bounce Gem (huge buff for UE Upgrade)
* Tibiadrome Potions
* Exercise weapons
# Arenas
### Arenas
In the arenas, you’ll face waves of monsters solo—each wave corresponds to an arena level. \
Defeat them to set new records and earn arena levels. Once you’ve reached the required level in a specific arena, you’ll unlock access to the Eclipse and Lunar Hunting zones, each of which has its own level and type requirement.
ARENAS TP in the Thais Temple
To enter the arena, you’ll need an Arena Tokens, which can be purchased from the Task Shop (3k HTP)
Lunar and Eclipse Arenas give the access to New Hunting Grounds
***
### Track Your Level
You can track your arena levels on the Eloria.pl website—just look up your character to see your best record for each arena.
***
### Finish arenas
To complete each arena, you must reach level 50. Once you hit level 50, you'll gain several benefits:
* After reaching 50 lvl of exact monster Arena, f.ex Acrid, Commoner, One Eyed Giant, even Zyr Naal\
You'll get the access to enter their dedicated Hunting exp spot\
Entrance costs differs based on the time you'd like to hunt there - from 5 silver tokens to 40.
Brand new Hunting Zone Arena!
* You'll be rewarded with Arena Point to spend on Arena Buff System
Arena Buff System
* After beating all 6 mix Arenas (Eclipse, Lunar , Eclipse 2k, Lunar 2k, Eclipse Lords, Lunar Lords)\
You'll get the access to enter 5k monsters (bottom of the Elden Room) and Elden Reputation monsters as well.
***
# Eclipse/Lunar
## Lunar & Eclipse
This is a custom Hunting Zone area where you’ll encounter new monster types. To enter any hunt here, you must reach a specific level in the corresponding arena type. The room is divided into two wings: the left hosts Lunar monsters, and the right hosts Eclipse monsters.
| Lunar | Eclipse |
| ----------------------------------------------------------------------------------------------------------------------------------------------------------------------------------------------------------------------------------------------------------------------------------------- | ------------------------------------------------------------------------------------------------------------------------------------------------------------------------------------------------------------------------------------------------------------------------------------------- |
|
|
|
Each time you kill a Lunar or Eclipse monster, you add one Soul to the server-wide counter. Once both the Lunar and Eclipse counters reach 100000, a special boss will spawn. Defeating that boss can drop powerful new equipment to make your character even stronger!
***
## Lunar Invictus & Eclipse Assailant
For every 1 000 Lunar or Eclipse monsters you kill, your hunting spot will be raided by a Lunar Invictus or an Eclipse Assailant. These mini-bosses have chance to drop special mount items, wheel scrolls or trade'able valuables.
Eclipse Assailant and Lunar Invictus
***
# UE Upgrade
#### ⚔️ Upgrading UE (Ultimate Element) – Step by Step
Your journey with **UE upgrades** starts **on the left side of the DP in Elden City**, right next to the emblem with **swords and green arrows** — that’s your Upgrade spot!
UE Upgrade altars in Elden City depot
***
**🔹 Choosing an Element for Extra Damage**
Right-click the emblem and pick which **element** you want to use to deal extra damage to monsters.\
Tip: Check which element works best against your targets here 👇\
🔗 [Monster Weakness List](https://eloria.pl/?monsters)
UE upgrade - elemental magic choices
***
**🔹 Element Upgrade – Damage Mastery (UE Upgrade Points)**
You can buy **UE Upgrade Points** from the **Hunting Task Shop** (the green chest on the right inside the depot).
* You can invest **up to 35 points per element**, giving a total of **+3500 extra damage**.
* It’s possible to **max out all elements** and switch between them depending on your hunting area — but it’ll take some time (and a good supply of **UE Upgrade Potions** 😅).
***
**🔹 Additional Upgrades (after choosing an element)**
Once you’ve selected your upgraded element, two more upgrades become available:
* ⚡ **Upgrade Damage Mastery** – your standard UE Upgrade Points.
* 💥 **Upgrade Explosion Mastery** – increases the *Explosion* effect that triggers after your UE bounces.
***
**🔹 Explosion Mastery**
**Explosion** can be upgraded up to **level 8**.\
Upgrade costs per level:\
`1, 3, 5, 7, 9, 11, 13, 15 Explosion Gems` + a small amount of gold (kk gp).
***
**🔹 Bounce – UE Ricocheting Between Monsters**
**Bounce Level 1** is unlocked by default *(max level: 10)*.\
Bounce increases your total UE damage and serves as the base for your **Explosion** effect.
To upgrade **Bounce**, click the emblem of your UE spell (for example: *Mas San* for RP, *Exori Gran* for EK).\
Upgrade costs per level:\
`1-2-3-4-5-6-7-8-9-10 Bounce Gems` + gold (kkk gp).
UE upgrade - spell boost (bounce)
***
**🔹 Upgrading Explosion & Bounce Together**
You can upgrade **both Explosion and Bounce** at the same time using different currencies:
*  **Reward Tokens** – for one of the upgrades
*  **Hunting Task Tokens** – for the other
Both upgrades stack and **massively boost your overall damage**, so it’s highly recommended to invest in both.
***
**🔹 Where to Get the Required Items**
**Bounce Gems**
* Available in the **Reward Shop** for **10,000 Reward Tokens**.
* You can earn Reward Tokens by:
* Completing tasks
* Participating in arenas
* Doing missions in Elden City
* Finishing quests
* Collecting and selling loot
* Exchanging loot for **Loot Points** at the **Rashid monument**
**Explosion Gems**
* Buyable in the **Task Shop** for **15,000 Task Tokens each**.
**UE Damage Points**
* Also in the **Task Shop** – **2,000 Task Tokens per point**.
# ELO System
What is ELO Ranking System?
#### 🏆 The ELO System – Compete, Climb, Conquer
The **ELO System** is a ranking and scoring mechanic inspired by **MOBA-style games**, designed to measure your progress in both **PvP** and **PvE** encounters.
***
**🔹 How It Works**
* Your **ELO points** increase or decrease depending on your victories or defeats.
* The system automatically matches opponents within your **level range (±500 levels)** to ensure balanced fights.
* The opponent’s level relative to yours determines ELO gain or loss:
* **Killing a higher-level player** → greater ELO gain
* **Killing a lower-level player** → smaller or no gain
***
**📅 ELO Seasons**
* Each season lasts **one month**.
* At the end of every season, players with the **highest ELO** receive special rewards.
* Rewards and rankings may vary with each edition.
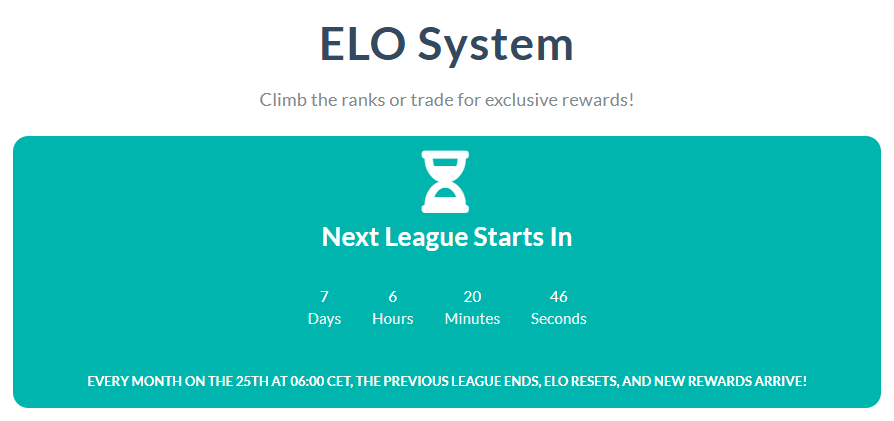
* You can monitor the **season timer** both **in-game** and on the website – it updates automatically.\
🔗 [Check current ELO standings](https://eloria.pl/?elo)
ELO Season counter
***
**🥇 ELO Ranks**
* As you gain more ELO points, your **rank** evolves to reflect your achievements.
* Your rank is **visible when someone looks at your character**.
* Every player starts at **Bronze rank**, but can climb higher through consistent victories.
***
**💎 League Shop – Exclusive ELO Rewards**
* You can spend **League Points** (earned during the season) in a **special ELO Shop** available only on the official website.
* Key details:
* The shop’s **offer rotates monthly**, aligning with each ELO season.
* **Exclusive and unique rewards** – unavailable anywhere else in the game.
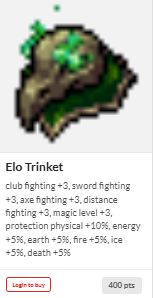
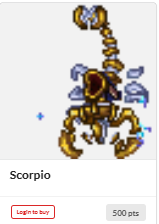
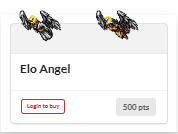
| Exclusive Trinket | Exclusive Mount | Exclusive Addon | Exclusive Item |
| ----------------------------------------------------------------------------------------------------------------------------------------------------------------------------------------------------------------------------------------------------------------------------------------- | ----------------------------------------------------------------------------------------------------------------------------------------------------------------------------------------------------------------------------------------------------------------------------------------- | ----------------------------------------------------------------------------------------------------------------------------------------------------------------------------------------------------------------------------------------------------------------------------------------- | ----------------------------------------------------------------------------------------------------------------------------------------------------------------------------------------------------------------------------------------------------------------------------------------- |
|
|
|
|
|
# Loyalty System
#### 💎 The Loyalty System – Earn More by Selling Smart
The **Loyalty System** allows you to collect **Loot Points** every time you sell items to **NPC Rashid**.\
These points can later be exchanged for valuable in-game rewards.
***
**💰 How It Works**
* For every **1,000 gold worth of loot** sold to Rashid, you automatically receive **1 Loot Point**.
* The process is **fully automatic** – just sell your items as usual, and points will be added to your account.
Loot Points info
***
**🎁 What Can You Trade Points For?**
At **Rashid**, you can exchange your Loot Points for:
* **Reward Token** – costs **1,000 Loot Points (The best possible way to farm Reward Tokens)**
* **Exclusive Mount**
* **Exclusive Outfit**
Loot Points Shop
# Skill and Perk System
#### The Perk System – Power Through Progress
The **Perk System** lets you enhance your character even further by investing points into **unique passive bonuses**.
Skills and Perk allocation statue in Thais Temple
***
**🔹 How It Works**
* For **every 50 levels**, you earn **1 Perk Point**.
* By **interacting with the statue**, you can choose a perk from the list and assign your point to it.
* You can invest **up to 20 points** into a single perk, making it stronger with each upgrade.
All Skills and Perks points visible from Eloria site - player profile
***
**🔹 Other Ways to Get Perk Points**
* From **loot chests** spawning in Thais/Elden City(can occasionally reward Perk Points)
* By **completing quests**
***
**🔹 Made a Mistake?**
If you **accidentally assign a wrong point**, don’t worry !\
You can **reset your entire Skill & Perk System** anytime through the **TC Store**.
Skill and Perk Reset available in TC store
# Guild Hideout
#### 🏰 Guild Hideout & Treasury Crafting
The **Guild Hideout** is not only your faction’s home but also a powerful **crafting hub** where teamwork truly pays off.\
Through the **Guild Treasury**, you and your guildmates can **deposit resources**, **unlock crafting tiers**, and **create exclusive high-level gear**.
***
**💰 Access to the Guild Treasury**
Inside the **Guild Hideout**, you’ll find a dedicated **NPC / interface** called the **Guild Treasury**.\
Here, every guild member can:
* **Deposit Reward Tokens** – contribute to the guild’s collective progress.
* **Deposit Gold** – transfer funds directly from your bank balance.
💡 *All contributions go into a shared treasury and are used to unlock crafting recipes and upgrades.*
***
**⚙️ How the Tier System Works**
Your **Guild Level** determines which crafting options and items are available.\
Each tier unlocks new sets of **weapons**, **armor**, **bags**, and **special items** exclusive to guild progression.
Hideout Tiers - allowing to exchange for better and better items!
***
**💎 Crafting Currencies**
* **Main Currency:** Extracted Strengths – obtained by selling items inside the Guild Hideout.
* **Additional Currencies:** Gold Tokens & Grand Stones – used for crafting bags and special high-tier items.
***
#### 🏆 Crafting Tiers Overview
**Tier 1 – Guild Level 1+ ⚔️**
* Unlocks **Soul Items** (e.g., *Soulcutter*, *Souleater*)
* **Cost:** 2× Extracted Strengths
**Tier 2 – Guild Level 2+ 🔮**
* Unlocks **Primal Items** (e.g., *Alicorn*, *Arboreal*, *Arcanomancer*)
* **Cost:** 4× Extracted Strengths
**Tier 3 – Guild Level 3+ 💰**
* Unlocks **Chronobag** and **Mystery Bag** crafting
* **Currency:** Gold Tokens & Elder Stones
**Tier 4 – Guild Level 4+ ⚡**
* Unlocks **Level 1200 sets** for all vocations (Knight, Druid, Sorcerer, Paladin)
* **Cost:** 40× Extracted Strengths
**Tier 5 – Guild Level 5+ 🩸**
* Unlocks **Sanguine Items** and their **Grand versions**
* **Cost:** 30–60× Extracted Strengths
**Tier 6 – Guild Level 6+ 🌙**
* Unlocks **Eternal Bag** (crafted using Elder Stones)
* Unlocks **Level 2500 sets** for all vocations
* **Cost:** 80× Extracted Strengths
**Tier 7 – Guild Level 7+ 🔥**
* Unlocks **Endgame Armor & Weapons** for all vocations
* **Cost:** 240× Extracted Strengths
***
💡 *The more your guild contributes, the faster you rise through the tiers — unlocking powerful new gear and crafting options for the entire team.*
# Ethereal Blacksmith
### 🛠️ Upgrade Item Crafting Guide
#### 🔹 Required Items
To begin the enhancement process, you must have the following:
* Hexbound Coffer
* Sunvault Core
* Ethereal Crystal
* Frozen Prism
* Runed Reliquary
* Infernal Vault
* Crimson Cache
* Gleaming Core
* Glinting Shard
All crystals required for crafting
***
#### 🔹 Crafting Upgrade Item – Level 1
1. Approach the **NPC Ethereal Blacksmith**.
2. Enter the following commands in the chat window:\
`hi → craft → yes`
3. You will receive **Upgrade Item Level 1**.
**📌 Usable on:**
* Helmet
* Armor
* BP
* Legs
* Boots
* Shield/Quiver/Spellbook
* Weapon
Illustration of Upgrade Item Level 1
***
#### 🔹 Crafting Higher Upgrade Levels
The process is simple: **combine 2 items of the same level to create 1 of the next level**.
**Steps:**
* 2× Upgrade Item Level 1 → Upgrade Item Level 2
* Dialogue: `hi → combine level 1`
* 2× Upgrade Item Level 2 → Upgrade Item Level 3
* 2× Upgrade Item Level 3 → Upgrade Item Level 4
* …continue up to **Upgrade Item Level 10**
**Combination Scheme:**
* **Level 1** = crafted directly at the NPC
* **Levels 2–10** = combine 2 items from the previous level
**Example:**
* You have 4× Upgrade Item Level 1
* Combine 2 → 1× Level 2
* Combine another 2 → 1× Level 2
* Combine both Level 2 items → 1× Level 3
All available upgrade stones
# Dungeons
### 🏰 Dungeon System – Conquer the Depths of Eloria
The **Dungeon System** on Eloria offers some of the most rewarding endgame content — challenging battles, unique mechanics, and valuable loot.\
There are **10 different dungeons**, each featuring various difficulty levels and monster tiers.
Dungeon Room entrance
Dungeon Room - selection
***
#### 🔹 Entry Requirements
To enter a dungeon, you’ll need between **2–13 Boss Tokens.**\
These tokens can be **obtained from all bosses** found in the **Boss Rooms** across Eloria.\
Besides that, there is an cooldown for all dungeons - 12hours.
***
#### 🔹 Dungeon Types
Each dungeon features monsters from different tiers and environments, including:
* **Lunar Monsters**
* **Eclipse Monsters**
* **2k Lunar Monsters**
* **2k Eclipse Monsters**
* **Lunar Lords**
* **Eclipse Lords**
* **5k Monsters** *(found in the bottom area of the Elden Room)*
***
#### 🔹 Dungeon Mechanics
All dungeons share the same layout and general mechanics:
1. **Entering the Dungeon**
* Once inside, keep an eye on your **Server Log** channel.
* It will display hints about where the next miniboss will spawn — either **East** or **West**.
2. **Miniboss Encounters**
* Each dungeon contains **3 minibosses**.
* They look like regular monsters but have:
* A **red name**
* An **extra prefix** in their name
* **Boosted stats and damage**
* Defeat all three minibosses to trigger the final boss fight.
3. **Dungeon Boss**
* After the minibosses are defeated, you’ll be **teleported to the boss room**.
* The **boss drops loot**, so make sure to **loot it manually**.
* Once defeated, a **gold chest** will appear.
4. **Rewards and Exit**
* Clicking the gold chest teleports you back to the **main dungeon selection room**.
* You’ll also receive a **reward in your backpack**:
* **Elder Stone** (tradeable in the Guild Hideout for 1.2k / 2.5k / 4k Bags)
* There’s also a **small chance** to receive the **bag directly** instead of the stone!
***
#### 🔹 Bonus Rewards – Dark Stars
In addition to the main loot, completing a dungeon also rewards you with **Dark Stars** — a special currency displayed **under your nickname**.
You can use **Dark Stars** to open **Reward Chests** on the right side of the dungeon room.
| Dungeon Reward Chests 1&2 | Dungeon Reward Chest 7 along it's requirements |
| ----------------------------------------------------------------------------------------------------------------------------------------------------------------------------------------------------------------------------------------------------------------------------------------------------- | ----------------------------------------------------------------------------------------------------------------------------------------------------------------------------------------------------------------------------------------------------------------------------------------------------- |
|
|
|
Possible rewards include:
* 📜 **Bonelord Tome** (+20 Levels)
* 🎒 **Bag You Desire / Bag You Covet**
* 💎 **Primal Bags**
* 🥇 **Arena Tokens**
* ⚗️ Other **valuable and rare items**
***
💡 **Tip:**\
The higher the dungeon tier, the better the rewards — but also the tougher the enemies. Bring strong imbuements, upgraded gear, and a coordinated team for the best results.
# Quest Champions
### 🔮 Fate Keeper System – Master Your Quests and Unlock Powerful Bosses
The **Fate Keeper** is your ultimate guide to all **major quests and boss unlocks** on Eloria.\
Through this system, you can **track your quest progress**, **earn rewards**, and **unlock endgame bosses** by collecting **Quest Points**.
You’ll find the **Fate Keeper NPC** standing as the guardian of progress — the one who watches over every adventurer’s journey.
Fate Keeper NPC in Quests Room
***
#### ⚔️ What Are Quest Points?
Each time you complete one of the listed quests, you earn a specific number of **Quest Points**.\
These points are your **progress currency** in the Fate Keeper System.
Your total points determine:
* Which **bosses** you can access
* Which **rewards** you can claim
* Your **adventurer rank**
You can hold up to **15 Quest Points** in total.
***
#### 🗺️ Checking Your Progress
Talk to the **Fate Keeper** and use the following commands in the chat window:
* `hi → status` – View your overall progress and stats.
* `hi → rewards` – Check which rewards you’ve unlocked or are close to unlocking.
* `hi → quests` – See a list of all available quests and their point values.
* `hi → bosses` – Check which bosses are locked or unlocked and how many points are needed for access.
* `hi → claim all` – Instantly claim all available rewards.
***
#### 📜 Quest Categories
Quests are divided into **three difficulty tiers**, each granting 1 Quest Point upon completion:
**Easy Quests:**
* Arena Greenhorn
* Arena Scrapper
* Arena Warlord
* Magic Longsword
* One Out of Four
**Medium Quests:**
* Tomreil Access Quest
* Hardcore Inquisition (INQ)
* Hardcore Pits of Inferno (POI)
**Hard Quests:**
* Hightower Quest
* Lost Souls Quest
* Highwater Quest
* Golden Hand
* Secrets in the Sandstone
* Cavern of Echoes
* Inferno Depths
*(Each completed quest is marked as `[DONE]` in the Fate Keeper menu.)*
***
#### 👑 Boss Unlock Progression
Completing quests gradually unlocks access to powerful bosses.\
Each boss requires a specific number of Quest Points to challenge:
| Boss Name | Tier | Required Points | Description |
| ---------------------- | ------------ | --------------- | ----------------------------------------------------------------------------- |
| **Echoing Oblivion** | Beginner | 6 | The weakest of the Oblivion bosses — a great starting point. |
| **Inferno Oblivion** | Intermediate | 12 | A formidable foe that tests your growing power. |
| **Forgotten Empress** | Advanced | 14 | An ancient entity of immense strength. Only seasoned adventurers can prevail. |
| **Veil Queen of Ruin** | Legendary | 15 | The ultimate challenge — face her only after mastering every quest. |
Forgotten Empress and Veil Queen Of Ruin
Echoing Oblivion and Inferno Oblivion
***
💎 **Boss Rewards:**\
Each of these bosses grants **valuable loot**, including:
* **Boss Tokens** – used for high-tier crafting and access
* **UE Upgrade Scrolls** – enhance your ultimate spell power
* **1.2k / 2.5k / 4k Equipment Bags** – filled with rare, vocation-based items
* **Additional unique rewards** – such as rare materials, cosmetic items, and upgrade components
***
#### 🎁 Rewards
As you collect Quest Points, you unlock **progress-based rewards** at specific milestones.\
For example:
* **Novice Adventurer Reward** – unlocked after 3 Quest Points
* **Skilled Adventurer Reward** – unlocked after 7 Quest Points
* **Master Adventurer Reward** – unlocked after 15 Quest Points
Each reward tier grants progressively better prizes — from consumables and tokens to powerful enhancement items.
To view or claim rewards, simply say:\
`hi → rewards` or `hi → claim all`
***
#### 🌟 Summary
* Complete quests → Earn Quest Points
* Gain points → Unlock stronger bosses
* Defeat bosses → Claim rare loot and high-value rewards
* Progress milestones → Unlock adventurer rewards
* Challenge the Fate Keeper’s trials → Become a true champion of Eloria
# Elden Reputation
The game features a special reputation system that allows players to unlock access to increasingly powerful hunting areas known as uber respawns.
\
To gain reputation, players can complete various tasks and activities for three key NPCs:
:hammer: Gravelbeard – The Mine \
Bring back stones mined from the quarry and help Gravelbeard with mining-related jobs to earn his trust.
Path to Gravelbeard in Elden City
:fishing\_pole\_and\_fish: Salty Sam – The Fisherman
\
Assist Salty Sam by catching fish and delivering rare specimens. Improve your fishing skills to unlock special assignments.
Path to Salty Sam in Elden City
:brain: Perceptor – The Scholar
\
Collect and bring him specific items—artifacts, tomes, alchemical ingredients—to support his research. Occasionally, he will offer special exploration missions.
Path to Perceptor in Elden City - he's upstairs :)
🎰 Daily roulette\
Always after a rough job, there is also some pleasure needed. Once you finish with the missions, don't forget to play a roulette and gain amazing rewards!
***
📜Summary\
The reputation system encourages players to explore different aspects of the game—mining, fishing, gathering—and serves as a gateway to elite hunting zones. Choose your path, build your reputation, and unlock access to the most dangerous and rewarding areas in the game!
New ELDER Room - This is just the beginning..
# \[Tutorials]
Hello Adventurers!\
This is a section dedicated to players - from players. Get familiar with it if you'd like to progress faster :)
# Beginner's Guide by Shadovv
### 👋 Hello, New Player!
Welcome to **Eloria OTS** — I’m really glad to see you here 🙂\
This short tutorial will help you through the **initial stages** of the game and give you a clear path to progress efficiently.
If you’re wondering how to begin on such a **customized map**, read on below 👇
***
#### ⚔️ Training
When you log in for the first time, you’ll need to **train your skills**.\
There are a few different ways to do that on this OTS:
**a) Training Monks**
* You can train here for free.
* Simply attack the **custom monks** to skill up your abilities.
**b) Exercise Dummy (recommended)**
* As a new player, you can get a **free exercise weapon** using the command `!gift`.
* Later, you can buy new exercise weapons from **NPC Mirabella** in Thais Temple.
* There are **two dummies** available: one near the left entrance to the DP, and another in Thais Temple (+1 floor).
**c) Better Exercise Dummies**
* **+10% Dummy** – available in the **TC Store** (you can unpack it in your house).
* **+30% Dummy** – located in DP+1 (gray teleport). Entry fee: **100kk**, trainable for **24 hours** straight (until server save at 5 AM). X-log works there.
* **+20% Dummy** – unlocked after gaining **200 reputation points** in **Elden City**. Free to use.
***
#### 🧪 Imbuements
Imbuements are one of the most important parts of character progression.
✅ **You don’t need to collect imbuement items manually!**\
Just talk to the **NPC near the left entrance of Thais DP** and say:\
`Hi → Imbuement Packages → Void / Vampirism / Epiphany`
Then simply **use the package on your equipment** at the imbuing shrine.
**Recommended setups:**
* **Helmet:** Void + Epiphany
* **Armor:** Vampirism + Elemental Damage (based on the monsters you hunt)
* **Weapon:** Void + Vampirism + Strike\
*(Later on, you can replace Void with Precision or another skill imbue if it becomes less effective.)*
***
#### 🧬 Skill & Perk System
Full guide: 🔗 [Skill & Perk System | Eloria Wiki](https://wiki.eloria.pl/english/intro/skill-and-perk-system)
It’s worth noting that **Potion Upgrade** works exceptionally well.\
Here’s my **recommended order** for investing points:
* 10× in **Potion Upgrade**
* 20× in **DMG Upgrade**
* 20× in **XP Upgrade**
* Then:
* EK/RP → +20 HP
* ED/MS → +20 Mana
After that, the rest depends on your playstyle and leveling focus.
***
#### 📜 Tasks
Tasks are one of the **core systems** on Eloria OTS.\
By completing them, you earn **Reward Tokens** and **Hunting Task Tokens**, which can be exchanged for:
* Outfits & Mounts
* Exalted Cores (for tiering)
* Arrow Slot Items
* %Potions
* **UE Upgrade Points** (the most valuable reward)
***
#### 🧭 Level Progression Path
Here’s a general path for early and mid-game:
**Level 1–150** → Rotworms → Dragons → Dragon Lords\
**Level 150–400** → Grim Reapers / Werehyenas / Asuras\
**Level 400–500** → Wardragons / Bultasaurs (`!task HARD 20 Years…`)
**Level 500** → Buy **%Potion** in Reward Token Shop (Thais DP, left chest – 50 Reward Tokens).\
Then start the **Arenas**.
**After beating Level 3 of Eclipse Mix Arena**, you can hunt **Manyhands** — perfect for this stage.\
If they deal too much damage, use a **def prey 10/10**.
**Level 1200** → Move to **Battlemages** (requires beating Level 5 of Eclipse Mix Arena).
**Level 2000+** → Start **Eclipse Mix 2k** or **Lunar Mix 2k** Arenas:
* Eclipse Mix 2k → grants access to **Lilith** and **Pindleskin**
* Lunar Mix 2k → unlocks **Leapers** and **Blood Hawks**
**Level 3000+** → Team hunts recommended:
* **Commoners** – unlocked via Eclipse Lords Arena
* **Beastmen of Azazula** – unlocked via Lunar Lords Arena
To unlock those, beat **at least Level 20** of their respective arenas.
**Level 2500–3000** → Focus on completing **all Arenas**:\
Eclipse Mix, Lunar Mix, Eclipse Mix 2k, Lunar Mix 2k, Lunar Lords Mix, Eclipse Lords Mix.\
This unlocks **special buffs** that boost your survivability and efficiency.
***
#### 🛡️ Equipment Progression
Don’t stress too much about gear early on — **Imbuements matter more**.\
Even if you’re still using basic gear at Level 200–400, it’s fine as long as your items are imbued.
**At Level 400:**
* Complete **Svargrond Arena Quest** (customized on Eloria).
* Level 1 → Gnome Set
* Level 2 → Lion Set
* Level 3 → Falcon Set
Once you start making money, you can buy or craft:
* **Soul Items** (Tier 1 Hideout)
* **Primal Items** (Tier 2 Hideout)
* **Sanguine Items** (Tier 5 Hideout)
Other ways to obtain them:
* **Elden Lord Boss** (drops Soulwar, Primal, and Sanguine Bags – Thais DP +1 green teleport)
* **Soulwar Quest** (classic reward system)
* **Primal Bag** (drops from Magma Bubble boss)
These items are **best until Level 1200**.
***
#### 🔥 Level 1200+ Equipment
At this stage, you can use **custom sets** that boost your **UE spells**.
**Ways to obtain:**
* **First Dragon Boss** (respawn every 20h) – drops **Chrono Bags** and **Mystery Bags**.
* **Hideout Tier 3** – trade **Gold Tokens (100/125)** or **10 Grand Stones** for a bag.
* **Dungeon Rewards** – chance to get Elder Grand Stones or bags as rare loot.
* **Hardcore INQ / POI Quests** – guaranteed Chrono & Mystery Bags upon completion.
***
#### 🌙 Level 2500+ and Beyond
At this point, you can obtain even stronger gear:
* Through **quests**
* Or by collecting rewards - **Grand Stones** from **Dungeons** (20 per bag).
**Level 4000+ Equipment** becomes available through:
* **Elden Level (Reborn at 5000)**
* **Special endgame quests**
***
#### 💬 Final Words
That’s it for today!\
If you encounter any issues or have questions — don’t hesitate to ask.\
We’ll be more than happy to help 🙂
# Wheel of Destiny - Skill Wheel
Reworked Skill Wheel
Skill Wheel - place where you can invest your points
You can now earn **Skill Wheel Points** through various in-game activities.\
Here are some examples of where to find them:
* 🧟♂️ **Defeating bosses** – points can drop in their loot.
* 🎯 **Hunting Task Shop** – available as rewards.
* 🗝️ **Chests** – scattered throughout your adventures.
* 🛡️ **Reputation Missions** – completing them can grant points.
* 🎰 **Lottery rewards** – from draws using Dungeon Points.
Skill Wheel Scrolls
On top of that, **Scrolls** can drop from **enhanced monsters**, which have a **0.2%–0.7%** chance to appear when a creature respawns.
Enhanced monsters
# Wheel of Destiny - Gem Atelier
Tutorial on how to invest your wheel points for every vocation
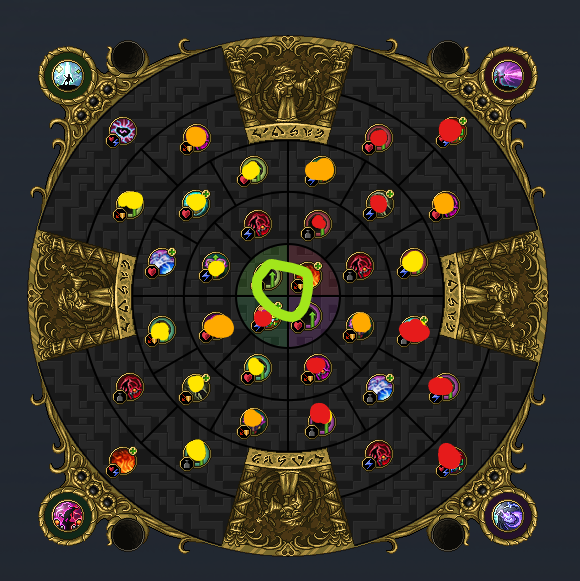
#### RP:
We open up the paths in all directions (green color).\
The most important thing for an RP is of course **Mas San** — there are two upgrades of this type on the wheel, so we go for them as a priority (red color).\
We unlock the **gem socket paths** through green arrows (yellow color).\
We add **vocation spell buffs** (pink).\
We add the remaining buffs (for RP this is mainly skills + life leech) (orange).\
Finally, we close the wheel — the rest of it. The best way is to max bottom left first, then bottom right, top left, and top right.\
(Utevo grav san hits hard 🙂)
RP Wheel order
***
#### MS:
Open up paths in all directions (green color).\
The most important thing for an MS is the **UE buff** — there are three of them on the wheel (red color).\
Unlock **gem socket paths** (yellow).\
Add remaining buffs (Mana Leech + Skill) (orange).\
Close the wheel — max top right, bottom left, bottom right, top left.\
**EXORI MOE** and **EXORI KOR** are insane!!11
MS Wheel order
***
#### ED:
Open paths in all directions (green color).\
ED’s downside is that it’s a weak class and doesn’t have a UE-related buff. So there’s no priority section on the wheel.\
Unlock **gem socket paths** (yellow).\
Add remaining buffs (Mana Leech + Skill) (orange).\
Close the wheel — max bottom right first, then top left, bottom left, and top right.
ED Wheel Order
***
#### EK:
Open up the paths in all directions (green color).\
The most important thing for an EK is **Exori Gran** — there are two upgrades of this type on the wheel, so go for them first (red color).\
Unlock **gem socket paths** (yellow).\
Add **vocation spell buffs** (pink).\
Add remaining buffs (for EK it’s mainly skills + life leech) (orange).\
Close the wheel — best to max bottom left first, then bottom right, top left, and top right.
EK Wheel order
***
#### 💎 GEMS — the real power of this OTS
Gems are the **true strength** on this OTS, especially considering that your equipment also boosts your vocation spells.
There are **4 types of gems**, one for each vocation:
* **Marksman Gem** (RP)
* **Sage Gem** (MS)
* **Guardian Gem** (EK)
* **Mystic Gem** (ED)
Each gem has **3 levels**:
* Lesser Marksman Gem
* Marksman Gem
* Greater Marksman Gem (example for RP)
There’s **no point** investing in Lesser or regular ones — they only give protection buffs and **no damage upgrades**.\
We go all in on **Greaters** 🙂
Once you’ve collected a few gems, go to the **Temple**, stand near the statue where you spend **Perk Points** (those you get every 50 levels), and open the **Wheel**.
Inside the wheel, there’s a second tab — **GEM ATELIER** — where you can see your crystals on the left side.\
If you have a **Greater Marksman Gem**, click **Reveal** (it costs 6kk), and the gem on the right will be generated with a buff.
Max Gem Atelier on RP
***
#### ⚔️ The most desired buffs are:
* **BASE DMG Aug Divine Caldera** – this is *Exevo Mas San* for RP
* **BASE DMG Aug Fierce Berserk** – this is *Exori Gran* for EK
* **BASE DMG Aug Hell’s Core** and **Aug Rage of the Skies** – these are *Exevo Gran Mas Flam* and *Exevo Gran Mas Vis* for MS
* **BASE DMG Aug Eternal Winter** – *Mas Frigo* for ED
Each of these buffs has a default single value, so don’t bother swapping them for different base dmg types.
If you manage to find and reveal one of the buffs above — **get three more! xD**\
Yes, you can have **FOUR of the same buffs**, one for each part of the wheel!
You can make them even stronger by **upgrading the gem** (on the right side when maxed), using **Greater Gem Fragments**, which you get by **dismantling unwanted gems**.
Fragment Workshop (buffing the gem)
# UE Upgrade
#### ⚔️ Upgrading UE (Ultimate Element) – Step by Step
Your journey with **UE upgrades** starts **on the left side of the DP in Elden City**, right next to the emblem with **swords and green arrows** — that’s your Upgrade spot!
UE Upgrade altars in Elden City depot
***
**🔹 Choosing an Element for Extra Damage**
Right-click the emblem and pick which **element** you want to use to deal extra damage to monsters.\
Tip: Check which element works best against your targets here 👇\
🔗 [Monster Weakness List](https://eloria.pl/?monsters)
UE upgrade - elemental magic choices
***
**🔹 Element Upgrade – Damage Mastery (UE Upgrade Points)**
You can buy **UE Upgrade Points** from the **Hunting Task Shop** (the green chest on the right inside the depot).
* You can invest **up to 35 points per element**, giving a total of **+3500 extra damage**.
* It’s possible to **max out all elements** and switch between them depending on your hunting area — but it’ll take some time (and a good supply of **UE Upgrade Potions** 😅).
***
**🔹 Additional Upgrades (after choosing an element)**
Once you’ve selected your upgraded element, two more upgrades become available:
* ⚡ **Upgrade Damage Mastery** – your standard UE Upgrade Points.
* 💥 **Upgrade Explosion Mastery** – increases the *Explosion* effect that triggers after your UE bounces.
***
**🔹 Explosion Mastery**
**Explosion** can be upgraded up to **level 8**.\
Upgrade costs per level:\
`1, 3, 5, 7, 9, 11, 13, 15 Explosion Gems` + a small amount of gold (kk gp).
***
**🔹 Bounce – UE Ricocheting Between Monsters**
**Bounce Level 1** is unlocked by default *(max level: 10)*.\
Bounce increases your total UE damage and serves as the base for your **Explosion** effect.
To upgrade **Bounce**, click the emblem of your UE spell (for example: *Mas San* for RP, *Exori Gran* for EK).\
Upgrade costs per level:\
`1-2-3-4-5-6-7-8-9-10 Bounce Gems` + gold (kkk gp).
UE upgrade - spell boost (bounce)
***
**🔹 Upgrading Explosion & Bounce Together**
You can upgrade **both Explosion and Bounce** at the same time using different currencies:
*  **Reward Tokens** – for one of the upgrades
*  **Hunting Task Tokens** – for the other
Both upgrades stack and **massively boost your overall damage**, so it’s highly recommended to invest in both.
***
**🔹 Where to Get the Required Items**
**Bounce Gems**
* Available in the **Reward Shop** for **10,000 Reward Tokens**.
* You can earn Reward Tokens by:
* Completing tasks
* Participating in arenas
* Doing missions in Elden City
* Finishing quests
* Collecting and selling loot
* Exchanging loot for **Loot Points** at the **Rashid monument**
**Explosion Gems**
* Buyable in the **Task Shop** for **15,000 Task Tokens each**.
**UE Damage Points**
* Also in the **Task Shop** – **2,000 Task Tokens per point**.
# Hardcore POI
#### 🔥 Quest Entry Requirements
Before you take on this challenge, make sure you meet the following conditions:
✅ Completed the **basic Pits of Inferno quest**\
✅ At least **level 1200**\
✅ All rewards from the **basic Pits of Inferno** must be collected
***
**🎁 Reward**
A **bag filled with level 1200+ equipment** 🧳⚔️
***
**📍 How to Access the Quest**
* Travel to the **city of Frogswell**
* Or use the **teleport in the quest room**
Where to find it
Hardcore POI quest!
# Hardcore INQ
#### 🛡️ A True Veteran’s Challenge!
Think you’ve seen it all? Time to prove it.\
This mission brings back the **classic Inquisition Quest (INQ)** — but **completely reimagined** in a **modern, high-level format**.\
Expect **intense battles**, **challenging mechanics**, and that unmistakable **epic Eloria atmosphere**.
***
**🔹 Requirements**
✅ Completed **Inquisition Quest (INQ)**\
✅ Completed the **basic Pits of Inferno Quest**\
✅ Minimum **Level 1200**
***
**🎁 Reward**
A **bag full of level 1200+ equipment** 🧳⚔️
***
🔥 Step into the inferno and show what a **true veteran** is made of!
Where to find it
Hardcore INQ quest!
# Imbuements – The Core of Your Power
Let’s talk about **imbuements** — one of the **most powerful boosts** you can get, both in the early game and in the endgame.
***
**🔹 Are They Worth It?**
**SHORT ANSWER:** YES, YES, AND ABSOLUTELY YES! 💪
Imbuements are essential — they make your character stronger, your hunts easier, and your progress much faster.
***
**🔹 Most Important Imbuements to Start With**
**🩸 Life Leech** – Heals you as you deal damage\
**🔮 Mana Leech** – Restores mana while dealing damage\
**⚔️ Strike** – Adds **50% critical damage** with a **10% chance**
At the start of the game, apply imbuements to your gear **as soon as possible**, provided the item supports it.\
Typically, you can imbue **helmets, armors, and weapons**.
They’re **very affordable** and will make your gameplay **much smoother**, helping you **level faster** and handle tougher monsters with ease.
***
**🔹 Where to Apply Imbuements**
You can apply imbuements in the Thais **Depot**, on the **left side**.
***
**🔹 Getting Imbuement Materials**
Talk to the NPC **Imbuement Assistant** and say:\
**hi → imbuement packages → strike / void / vampirism**
You’ll instantly receive a **bag with all the required materials**.
***
Imbuements are a **key part of the game**, especially with **custom monsters** that hit harder and drop better — don’t skip them if you want to stay ahead! ⚔️✨
Imbuement Assistant in Thais depot
# Elden Reputation - Mining Stones
#### ⛏️ Mission: Mining Stones in the Quarry
To start the mission, head to **NPC Gravelbeard**, found **to the left of the depot in Elden City**.\
Say to him:\
**hi → mission**\
He’ll tell you which **stones are required for the day**.
***
**🔹 Types of Stones (randomized daily)**
* Death Stone
* Fire Stone
* Holy Stone
* Tera Stone
* Ice Stone
* Energy Stone
***
**🔹 Preparation**
Buy an **Ice Thawing Pick (pickaxe)** from Gravelbeard by saying **trade**.\
Then enter the mine through the **red teleport next to the NPC**, go down the stairs, and start mining.
***
**🔹 Mining the Stones**
Use your pickaxe on the **white rocks** found inside the mine.\
The drop rate is **fairly low**, so expect to do a bit of running around.\
There’s also a **luck mechanic** built into the system — after every use, you’ll see a message in your **Server Log**.\
If you get the message **"You can’t mine here"**, just move to another rock and try again.
***
**🔹 Completing the Mission**
Once you’ve collected all the required stones, return to **Gravelbeard** and say:\
**hi → complete**
***
**🎁 Rewards**
* Random **Reputation** (7–35 points)
* **10 ELO points**
* **Reward & Task Tokens**
* **Wheel Scrolls**
NPC Gravelbeard
# Elden Reputation - Fishing
#### 🎣 Mission: Fishing
Head to **Salty Sam**, the fisherman NPC located **a few tiles north of Gravelbeard in Elden City**.\
To start the mission, say:\
**hi → mission**\
Once you’ve caught all the required fish, finish it by saying:\
**hi → complete**
***
**🔹 Required Fish (randomized daily)**
 **Shimmer Swimmer**
* **Location:** Dirty water in southern Venore *(also found in Elden City)*
* **Requirements:** Fishing Rod + Worms *(buy from NPC Mirabella → type: tools)*
* **How to get there:** Enter the hunting ground → go down the stairs twice → walk left
 **Old Nasty**
* **Location:** Same spot as Shimmer Swimmer *(also found in Elden City)*
* **Requirements:** Fishing Rod + Worms
 **Northern Pike**
* **Location:** Ice holes in Svargrond *(also available in Elden City)*
* **Requirements:** Regular Pickaxe to break the ice + Fishing Rod
 **Rainbow Trout**
* **Location:** Svargrond glaciers *(also available in Elden City)*
* **Requirements:** Pickaxe + Fishing Rod
 **Sandfish**
* **Location:** Shallow waters in the **Dark Wolf hunting ground** *(also found in Elden City)*
* **Note:** The hardest fish to catch — **very low drop rate**, not everyone succeeds.
**Fish**
* **Location:** Most bodies of water across Eloria
* **Note:** Can also be caught while fishing for other species (like Shimmer Swimmer or Rainbow Trout).
***
**🎁 Rewards**
* Random **Reputation** (7–35 points)
* **10 ELO points**
* **Reward & Task Tokens**
* **Wheel Scrolls**
NPC Salty Sam
# Elden Reputation - Item Collector
#### 📦 Mission: Item Collecting
Head to **Perceptor**, the NPC located **north of the depot (DP) in Elden City**.\
👉 **Tip:** Use the map — the NPC is accessible **after climbing the ladder**.
To start the mission, say:\
**hi → mission**\
Once you’ve gathered all the required items, complete it with:\
**hi → complete**
***
**🔹 What’s the Mission About?**
Perceptor will ask you to **collect a specific number of items** dropped by various monsters.\
He’ll also tell you **which monsters drop the required items**, helping you plan your **farming routes** more efficiently.
***
**🔹 Important Notes**
* The requested items may drop from **different monsters and locations**, so expect some exploring.
* This mission can be completed **once every 24 hours**.
***
**🎁 Rewards**
* Random **Reputation** (7–35 points)
* **10 ELO points**
* **Reward & Task Tokens**
* **Wheel Scrolls**
NPC Perceptor
# Elden Reputation - Alchemist
#### 🧪 Mission: Potion Crafting
Visit **Azoth Alchemist**, located in **Elden City, Depot Level +1**.\
He’s your go-to NPC for brewing powerful potions that grant both **combat and utility bonuses**.
***
**🔹 How It Works**
You can craft **one potion every 2 hours**.\
Each crafted potion grants **3–6 reputation points**.\
No special commands are needed — simply **gather the required ingredients** and **select** the potion you wish to craft.
***
**🔹 Available Potions & Effects**
**Arcane Catalyst** – +15 Magic Level for 1 hour\
**Drunk Rune** – Makes another player drunk for 30 seconds\
**Dust Collector’s Brew** – +150 Dust\
**Elixir of Vital Flow** – Restores +300 HP and +300 MP every 3 seconds for 1 hour\
**Essence of Restoration** – Instantly restores full HP and Mana\
**Phial of Immortality** – Grants invincibility for 20 seconds\
**Warrior’s Tincture** – +15 to all combat skills *(Distance, Sword, Axe, Club, Shielding)* for 1 hour
NPC Azoth Alchemist
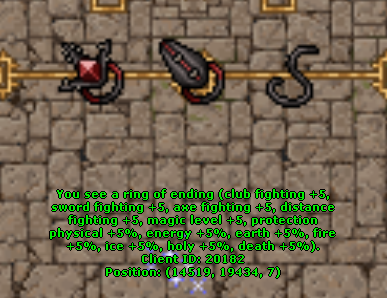
# Ring of Ending
#### 💍 Crafting the Ring of Ending
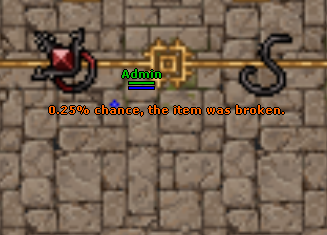
By crafting the **Ring of Ending** the classic way — combining **String of Mending** + **Broken Ring of Ending** — you get a **0.25% chance** to create the **strongest ring on the server**! 💍🔥
***
**🔹 Ingredients**
**String of Mending** – dropped by:
* Pindleskin
* Sight of Surrender
**Broken Ring of Ending** – dropped by:
* Yielothax
Fail while crafting
Successfully crafted Ring of Ending
# Exaltation Forge
### ⚙️ Exaltation Forge – Convergence System (Eloria OTS)
The **Exaltation Forge** is one of the most powerful enhancement systems on Eloria.\
It allows you to permanently strengthen your gear and safely **transfer progress between items** using the **Convergence** feature.
Unlike standard forging, **Convergence has no chance to fail**, making it the safest and most efficient way to upgrade your late-game equipment.
Exaltation forge & Convergence option
***
#### 💠 What Is Convergence?
**Convergence** is a special option in the Forge that lets you:
* Transfer progress from one item to another of the same type and classification,
* Combine two same clasification items to keep the higher bonuses,
* Safely maintain your progress without the risk of losing materials or tiers.
It’s primarily used for **Classification 4 items** — As the custom gear on Eloria (1.2k/2.5k/3.5k/4k items have that).
Classification 4 caption on Soulbleeder
Classification caption of custom Eloria items
***
#### 🧭 How to Access the Forge
There are **two ways** to access the Exaltation Forge on Eloria:
1. **Temple Access (Classic Way)**\
Go to the **Thais Temple**, then enter the Adventurer's Island through the teleport on the right side.\
Go downstairs, and move north-east. You will come across the Exaltation Forge right after passing the bridge. You can freely use all Forge options there.
2. **Mobile Forge item**\
A **Mobile Forge** can be purchased from the **Hunting Task Token Shop** in Thais depot for **5,000 Hunting Task Tokens**.\
It allows you to use the Forge **anywhere**, including during hunts — perfect for players who forge and upgrade gear frequently.
***
#### 🔩 Core Materials for Exaltation Forge
The Forge requires specific materials to function.\
They form a simple crafting chain:
* **Dust** → Basic forging currency.
* **Sliver** → Refined material for higher upgrades, or exalted core crafting.
* **Core** → Advanced component for top-tier crafting and transfering.
**🔹 Material Conversion (Eloria Customization)**
On Eloria, **Slivers can be converted directly into Dust**:
* Clicking on a Sliver grants **5 Dusts**.
* You can exchange Slivers up to a total limit of **100 Dusts**.
💡 This makes Slivers an extremely flexible currency — useful for refilling Dust stock instantly when you run low.
***
#### ⚙️ How Convergence Fusion Works
1. **Open the Exaltation Forge** (Temple or Mobile).
2. Select the **Convergence** option.
3. Choose your **Base Item** (the one you want to keep and strengthen).
4. Choose your **Donor Item** (the one that will be consumed).
5. Confirm the process — there’s **no failure risk**.
The result: your base item inherits higher tier (higher chance of triggering the buff)
Convergence Fusion
***
#### ⚙️ How Convergence Transfer Works
1. **Open the Exaltation Forge** (Temple or Mobile).
2. Open the second Tab (Transfer) and select the **Convergence** option.
3. Choose the **Item** from which you'd like to move your tier (the one which will be consumed).
4. Choose your **Target Item** (the one on which you'd like to have the tier added).
5. Confirm the process — there’s **no failure risk**.
The result: your target item inherits tier from the consumed item (It will be lost in the process).
Covergence Transfer
***
#### 💎 Increasing Your Dust Capacity
On Eloria, you can **increase your Forge Dust capacity** to make forging and transferring smoother.\
It’s highly recommended to expand it up to **160 Dusts**, allowing you to forge and transfer across all tiers (1–2, 4–5, or 9–10).
This limit ensures you never run out of space during multi-tier Convergence sessions.
***
#### 🛡️ Tier Buffs and Their Effects
Each **item slot** provides unique passive bonuses as you raise its tier in the Forge.\
Here’s what you gain by tiering your gear:
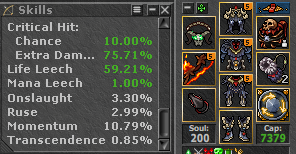
| Item | Bonus Type | Description |
| ---------- | ------------- | ------------------------------------------------------------------------------------------------------------------------------------------------------------------------------------------------------------------------ |
| **Weapon** | Onslaught | adds a chance to deal a critical hit – 60% additional damage |
| **Armor** | Ruse | adds a chance to evade damage |
| **Helmet** | Momentum | every two seconds, while the combat indicator is visible, adds a chance to reduce cooldowns by 2 seconds; applies to individual spell cooldowns and the second cooldown group – does not affect the first cooldown group |
| **Legs** | Transcendence | grants a chance to transform into a Level 3 Avatar for 7 seconds after performing an attack |
💡 *Higher tiers amplify these buffs further with the higher chance of trigger.*
Tiered equipment and it's bonus
***
#### 🧠 Tips & Best Practices
* Focus your resources on **Classification 4** gear — it’s permanent and transferrable.
* Always convert extra Slivers into Dust when needed to stay forging-ready.
* Buy the **Mobile Forge** early — it pays off long-term for active players.
* Raise your Dust capacity to 160 as soon as possible for smooth crafting.
* Don’t dismantle duplicate Class 4 items — they’re invaluable for safe Convergence.
# Boss Locations
### 👑 Boss Locations – Discover the Strongholds of Eloria’s Mightiest
Across the lands of Eloria, ancient beings, corrupted spirits, and powerful warlords await those brave enough to face them.
Each boss holds not only unique treasures — but also the key to Bestiary and Bosstiary progression, empowering your Equipment Bonus and Charm efficiency.
Defeating these bosses might help you with mastering Eloria’s endgame.
### Fleshslicer
Path to Fleshslicer
### The Ravager
Path to The Ravager
### Bragrumol
Path to Bragrumol
### Lisa
Path to Lisa
### Glooth Fairy
Path to Glooth Fairy
### Bullwark
Path to Bullwark
### Ancient Spawn of Morgathla
Path to Ancient Spawn of Morgathla
### The Abomination
Path to The Abomination
### The Frog Prince
Path to The Frog Prince
### Oskayaat is drowning in the Boss Amount...
### Big Boss Trolliver
### Fleabringer
### Mornenion
### Robby the Reckless
### Elvira Hammerthrust
Path to above Oskayaat Bosses
### Smuggler Baron Silvertoe
Path to Smuggler Baron Silvertoe
### Groam
Path to Groam
### Xenia
Path to Xenia
### Willi Wasp
Path to Willi Wasp
### Zomba
Path to Zomba
### General Murius
Path to General Murius - Mintwallin
### Hairman The Huge
Path to Hairman The Huge
### Barbaria
Path to Barbaria
### Yaga the Crone
Path to Yaga the Crone
### Elf Overseer & Dharalion
Path to Elf Overseer and Dharalion
### Rukor Zad
Path to Rukor Zad
### White Pale
Path to White Pale
### Rotworm Queen
Path to Rotworm Queen
### The Percht Queen
Path to The Percht Queen
### The Blightfather
Path to The Blightfather
### The Evil Eye
Path to The Evil Eye
### Man in the Cave
Path to the Man in the Cave
### Hirintror
Path to the Hirintror
### Grandfather Tridian
Path to the Grandfather Tridian
### Warlord Ruzad
Path to the Warlord Ruzad
### Diblis The Fair
Path to the Diblis The Fair - Nargor
### Zevelon Duskbringer
Path to the Zevelon Duskbringer - Hellgate
### Arachir The Ancient One & Gravelord Oshuran
Path to the Arachir The Ancient One & Gravelord Oshuran - Drefia Vampire Hell
### Sir Valorcrest
Path to the Sir Valorcrest
### Battlemaster Zunzu
Path to the Battlemaster Zunzu
### Dreadmaw
Path to the Dreadmaw
### The Voice of Ruin
Path to The Voice of Ruin
### Horestis
Path to the Horestis
***
# Wprowadzenie
Czym dokładnie jest Eloria?
Eloria to serwer typu **Global-Evolution**, wypełniony niestandardową zawartością: nowymi przedmiotami, zaklęciami, potworami, mapami, systemami oraz unikalnymi mechanikami rozgrywki.
Poniżej znajduje się mała zapowiedź tego, co możesz znaleźć na naszym serwerze.
{% embed url="" %}
***
# Odświeżona Mapa Thais
Z dumą przedstawiamy niestandardową mapę Thais, stworzoną specjalnie dla Eloria OTS.
Thais Depot - poziom 0
Map Legend
1 - NPC Mirabella (Pierścienie, Amulety, Broń treningowa, Ekwipunek dystansowy)
2 - NPC Rashid (Kupiec)
3 – Skrzynia z Nagrodami (Wymień swoje Loot Points na Reward Tokens oraz dodatkowe stroje i wierzchowce)
4 - Training Monki
5 - Adventurer's Island (Skrzynia z nagrodami i Exaltation Forge)
6 - Teleport na Areny
7 – Skrzynie z Reward i Task Tokens
8 – Wejście do Hideoutu
9 – Wejście do pokoju z Dungeonami
10 - NPC Naji (Bankier)
11 – Imbuement Assistant (kupuj tutaj materiały do imbuementu, a Imbuement Shrine znajduje się bezpośrednio po jego lewej stronie)
12 & 13- Exercise Weapon dummies
14 - Offline Training
15 - Elden City - Boss Room - Skill and Perk Statue - Quests Room - Global Hunts teleports
15 - Elden City - Boss Room - Skill and Perk Statue - Quests Room - Global Hunts
***
Thais Depot - poziom 1
| Map Legend |
| :-------------------------------------------------------------------------------------------------------------: |
| 1 – Wyspa Bossów (**Elden Lord** pojawia się po zebraniu dusz, rajdy bossów organizowane przez Administratorów) |
| 2 - Exercise Weapon dummy |
| 3 – Skrzynie z nagrodami za poziom (Darmowe zwoje **Wheel of Destiny**) |
| 4 – Pokój Treningowy (**Dummy +30%**, opłata za wejście 100kk, możliwość **xlogowania** aż do zapisu serwera) |
| 5 – Muzeum z przedmiotami **Eloria** |
# Expowiska Globalne
| Map Legend |
| :------------------------------------------------------------------------------------------------------: |
| 1 - Expowiska Lunar Mix (Mirandas / Spirit Jelly / Corrupted Diremaw/ Glinstone Warrior / Wraith Caller) |
| 2 - Expowiska Eclipse Mix (Manyhands / Acrid / Charybdis / Glinstone Mage / Battlemage) |
| 3 - Expowiska Lunar Mix \[2k] (Leaper / Blood Hawk) |
| 4 - Expowiska Eclipse Mix \[2k] (Pindleskin / Lilith) |
| 5 - Expowiska Lunar Lords Mix (Beastman of Azazula / Valiant Ghost) |
| 6 - Expowiska Eclipse Lords Mix (Commoner / Twinsage Sorcerer) |
| 7 - Expowiska Elder (Bayle / Elder Wyrm / Zorvath / One Eyed Giants / Vytherion) |
| 8 – Areny Łowieckie (Płatne expienie po ukończeniu **50/50** potworów na arenie) |
| 9 - Thais Temple Teleport |
| 10 - Areny |
| 11 - Boss Room Teleport |
| 12 - Elden City Teleport |
# Miasto Elden
### Miasto Elden – Serce Nowoczesnej Elorii
**Elden City** to najnowsze i najważniejsze centrum Elorii — rozległa, odnowiona stolica stworzona dla poszukiwaczy przygód, którzy zakończyli już początkowy etap gry i są gotowi na nowe wyzwania.\
Miasto pełni rolę głównej bazy dla **codziennych misji, farmienia reputacji, craftingu** oraz dostępu do niestandardowej zawartości serwera.
Elden
| Map Legend |
| :---------------------------------------------------------------------------------: |
| 1 – **Depo w Elden City** (Alchemik na 1. piętrze, codzienna loteria na 2. piętrze) |
| 2 - Ołtarze UE Upgrade |
| 3 - NPC Gravelbeard |
| 4 - NPC Salty Sam |
| 5 - NPC Perceptor ( 1st floor) |
***
#### Lokalizacja i Przeznaczenie
**Elden City** zostało zaprojektowane jako baza operacyjna dla graczy na **średnim i zaawansowanym etapie gry**.\
Znajdziesz tu wszystko, czego potrzebujesz, by skutecznie się rozwijać — od **teleportów do nowych miejsc polowań**, po **NPC-ów oferujących misje, zadania i możliwość craftingu**.
Niezależnie od tego, czy chcesz zdobywać reputację, farmić tokeny, czy ulepszać swój ekwipunek — **Elden City** to miejsce, w którym Twoja przygoda naprawdę nabiera tempa.
Licznik reputacji w czasie rzeczywistym (Gdy osiągnie wartość 10000 – na Boss Island pojawi się boss Elder)
|
| ELDEN LEVELS |
Miejsce, w którym możesz odrodzić swoją postać (Reborn jest możliwy po osiągnięciu poziomu 5000 – resetuje Twoją postać do poziomu 20, daje Elden Powers, nagradza potężnymi przedmiotami lub pozwala zmienić profesję)
|
Ołtarze ulepszania UE po lewej stronie depozytu Elden City
# Nowe Czary
✨ **Nowe Zaklęcia Specjalne (Poziom 300+)**\
Od poziomu 300 każda profesja na Elorii zyskuje dostęp do unikalnego, własnego zaklęcia — potężnej umiejętności typu *single-target*, zaprojektowanej zarówno do walk PvP, jak i PvE.\
Każde z nich zapewnia wyjątkową przewagę w stylu gry, dodając głębi do rotacji czarów i nagradzając precyzyjne użycie.\
Zaklęcia skalują się dynamicznie wraz z poziomem postaci i poziomem magii, zapewniając płynny wzrost obrażeń w miarę rozwoju.
⚔️ **Knight – Astral Tear**\
Niszczycielski atak dystansowy nasycony energią astralną. Idealny do szybkiego wykańczania silnych przeciwników lub zadawania potężnych obrażeń w PvP.
🌿 **Druid – Nova Strike**\
Wypuszcza skoncentrowaną falę magii lodu w pojedynczy cel. Doskonały do długotrwałych walk dzięki wysokiemu DPS-owi i synergii z leczeniem.
🔥 **Sorcerer – Abyssal Strike**\
Kanalizuje surową, otchłanną energię w jednego przeciwnika, zadając ogromne obrażenia energią. Idealny do eliminowania potężnych potworów i dominacji w pojedynkach.
🏹 **Paladin – Regalia Burst**\
Promienisty, święty pocisk przebijający mrok, zadający precyzyjne i potężne obrażenia dystansowe. Świetny do regularnych, silnych ataków z dystansu.
# System Tasków (Task Tokeny)
## Eloria Task System
Aby uzyskać dostęp do systemu zadań (Tasków), udaj się do **Tablicy Zadań** w Świątyni Thais lub po prostu wpisz komendę **!task**.\
Poluj na potwory, aby ukończyć zadania i zdobywać **Reward Tokeny** oraz **Hunting Task Tokeny**.\
Zadania są podzielone według rodzaju potworów i stref łowieckich, co ułatwia ich przeglądanie.\
Im więcej zadań ukończysz, tym więcej **ekskluzywnych wyzwań** odblokujesz!
Tablica z Taskami dostepna w Thais Temple
Możesz z łatwością śledzić postępy swoich zadań, sprawdzając **ikonę powiadomień o Taskach** po prawej stronie ekranu postaci.\
Pokazuje ona, ile potworów zabiłeś w ramach aktualnego zadania, a licznik **aktualizuje się dynamicznie** — zmienisz miejsce polowania, a system natychmiast zacznie zliczać zabicia nowych potworów.
System zadań hybrydowych z zadaniem Hunting Task (możesz sprawdzić ilość posiadanych HTP)
Ikona licznika zabitych zadań
Oprócz powyższej opcji sprawdzenia, ile posiadasz Hunting Task Tokens, po prostu użyj komendy !htp.
***
## Sklep za Hunting Task Tokeny
W Task Shop możesz wydać swoje ciężko zarobione Hunting Task Tokens na różnorodne nagrody — od Arena Tokens po ekskluzywne stroje i wiele więcej!
Skrzynki Reward i Task Shop dostępne w Thais DP
**Najbardziej pożądane to:**\
**Gem Atelier i Wheel Scrolls**
* Gem Atelier używany w Wheel Destiny, Wheel Scrolls (jednorazowego użytku) do zdobywania dodatkowych punktów na koło.
**Dodatkowe przedmioty**
* UE Upgrade Potion (maksymalnie do 35)
* Explosion Gem (buff dla UE Upgrade)
* Mobile Forge (umożliwia korzystanie z Exaltation Forge w dowolnym miejscu i czasie)
* Arena Tokens (umożliwiają dostęp do Aren, które odblokowują nowe, niestandardowe spawny)
# Reward Tokeny
**Reward Tokens – kolejna waluta w grze Eloria**\
Na każdym etapie gry będziesz zdobywać Reward Tokens. Możesz je otrzymać, pokonując bossów, pozostając online, zbierając codzienne nagrody, wygrywając eventy, wykonując questy i wiele więcej.
| Sklep Reward Token | Codzienne nagrody w postaci RT Reward Shrine |
| ----------------------------------------------------------------------------------------------------------------------------------------------------------------------------------------------------------------------------------------------------------------------------------------- | ----------------------------------------------------------------------------------------------------------------------------------------------------------------------------------------------------------------------------------------------------------------------------------------- |
|
|
|
***
Reward Token
Każdy token, który otrzymasz, pojawia się tak, jak pokazano na powyższym obrazku. Musisz przypisać go do swojej postaci, a gdy zostanie przypisany, będziesz mógł kupować przedmioty.\
Reward Shop jest regularnie aktualizowany o nowe dodatki. Poniżej znajdują się najbardziej pożądane przedmioty:
* %Ultimate Spirit, %Ultimate Mana, %Ultimate Health Potiony
Te mikstury są używalne powyżej poziomu 500 przez RP, ED+MS, EK. Można je ulepszać za pomocą Skill & Perk System.
* Bounce Gem (ogromny buff dla UE Upgrade)
* Tibiadrome Potions
* Exercise Weapons
# Areny
### Areny
Na arenach stawisz czoła falom potworów w trybie solo — każda fala odpowiada poziomowi areny.\
Pokonaj je, aby ustanawiać nowe rekordy i zdobywać poziomy areny. Gdy osiągniesz wymagany poziom w konkretnej arenie, odblokujesz dostęp do stref Eclipse i Lunar Hunting, z których każda ma własne wymagania dotyczące poziomu.
ARENAS TP w Thais Temple
Aby wejść na arenę, potrzebujesz Arena Token, który można kupić w Task Shop (3k HTP).
Lunar i Eclipse Areny dają dostęp na nowe Expowiska
***
**Śledź swój poziom**\
Możesz śledzić swoje poziomy areny na stronie Eloria.pl — wystarczy wyszukać swoją postać, aby zobaczyć najlepszy wynik w każdej arenie.
Progress Aren
***
**Ukończenie aren**\
Aby ukończyć każdą arenę, musisz osiągnąć poziom 50. Po osiągnięciu poziomu 50 zyskasz kilka korzyści:
* Po osiągnięciu 50 poziomu w konkretnej arenie potworów, np. Acrid, Commoner, One Eyed Giant, a nawet Zyr Naal,
* Otrzymasz dostęp do dedykowanego miejsca do polowań dla danego potwora,
* Koszt wejścia zależy od czasu, jaki chcesz spędzić na polowaniu — od 5 do 40 Silver Tokens.
Nowy system Hunting Aren
**Otrzymasz Arena Points, które możesz wydać w Arena Buff System**
Arena Buff System
**Po pokonaniu wszystkich 6 Mix Aren (Eclipse, Lunar, Eclipse 2k, Lunar 2k, Eclipse Lords, Lunar Lords)**\
Otrzymasz dostęp do 5k potworów (na dole Elden Room) oraz do potworów związanych z Elden Reputation.
***
# Eclipse/Lunar
## Lunar & Eclipse
**To jest niestandardowa strefa Hunting Zone, w której spotkasz nowe typy potworów.**\
Aby rozpocząć polowanie w tej strefie, musisz osiągnąć określony poziom w odpowiadającym typie areny. Pokój jest podzielony na dwa skrzydła: lewe zajmują potwory Lunar, a prawe potwory Eclipse.
| Lunar | Eclipse |
| ----------------------------------------------------------------------------------------------------------------------------------------------------------------------------------------------------------------------------------------------------------------------------------------- | ------------------------------------------------------------------------------------------------------------------------------------------------------------------------------------------------------------------------------------------------------------------------------------------- |
|
|
|
**Za każdym razem, gdy zabijesz potwora Lunar lub Eclipse, dodajesz jedną Duszę do licznika ogólnego dla serwera.**\
Gdy zarówno licznik Lunar, jak i Eclipse osiągną 100 000, pojawi się specjalny boss. Pokonanie tego bossa może dać potężny nowy ekwipunek, który uczyni Twoją postać jeszcze silniejszą!
***
## Lunar Invictus & Eclipse Assailant
**Za każde 1 000 zabitych potworów Lunar lub Eclipse Twoje miejsce polowania zostanie zaatakowane przez Lunar Invictus lub Eclipse Assailant.**\
Ci mini-bossowie mogą upuścić specjalne przedmioty do wierzchowców, Wheel Scrolls lub wartościowe przedmioty możliwe do wymiany/sprzedaży.
Eclipse Assailant i Lunar Invictus
***
# Ulepszanie UE
#### ⚔️ Ulepszanie UE - krok po kroku
Twoja przygoda z ulepszaniem UE zaczyna się po lewej stronie DP w Elden City, tuż obok emblematu z mieczami i zielonymi strzałkami — to Twoje miejsce Upgrade!
Ołtarze UE Upgrade in Elden City depot
***
**🔹** Wybór Elementu dla Dodatkowego Obrażenia
Kliknij prawym przyciskiem emblematu i wybierz element, którym chcesz zadawać dodatkowe obrażenia potworom.\
**Tip:** Sprawdź, który element działa najlepiej na Twoje cele 👇\
🔗 [Monster Weakness List](https://eloria.pl/?monsters)
UE upgrade - wybór elementu
***
**🔹 Ulepszanie Elementu - Damage Mastery (UE Upgrade Points)**
Możesz kupić UE Upgrade Points w Hunting Task Shop (zielona skrzynia po prawej stronie w depozycie).\
Możesz zainwestować do 35 punktów na element, co daje łącznie +3500 dodatkowych obrażeń.\
Możliwe jest maksowanie wszystkich elementów i zmiana między nimi w zależności od miejsca polowania — zajmie to trochę czasu (i dobre zapasy UE Upgrade Potions 😅).
***
**🔹 Dodatkowe Ulepszenia (po wyborze elementu)**
Po wybraniu elementu do ulepszenia, odblokowują się dwie kolejne opcje:\
⚡ **Upgrade Damage Mastery** – standardowe UE Upgrade Points\
💥 **Upgrade Explosion Mastery** – zwiększa efekt Explosion, który aktywuje się po odbiciu UE
***
**🔹 Explosion Mastery**
Explosion można ulepszyć maksymalnie do poziomu 8.\
Koszt ulepszenia na poziom:\
1, 3, 5, 7, 9, 11, 13, 15 **Explosion Gems** + niewielka ilość złota (kk gp)
***
**🔹 Bounce – UE Odbijanie się między potworami**
Bounce Level 1 jest odblokowany domyślnie (maksymalny poziom: 10).\
Bounce zwiększa całkowite obrażenia UE i jest bazą dla efektu Explosion.\
Aby ulepszyć Bounce, kliknij emblem UE swojego czaru (np. Mas San dla RP, Exori Gran dla EK).\
Koszt ulepszenia na poziom:\
1-2-3-4-5-6-7-8-9-10 **Bounce Gems** + złoto (kkk gp)
UE upgrade - ulepszenie czaru (bounce)
***
**🔹 Ulepszanie Explosion i Bounce Równocześnie**
You can upgrade **both Explosion and Bounce** at the same time using different currencies:
*  **Reward Tokens** – na ulepszenie Bounce
*  **Hunting Task Tokens** – na ulepszenie Explosion i UE Upgrade
Oba ulepszenia się sumują i znacząco zwiększają całkowite obrażenia, więc warto inwestować w oba.
***
**🔹 Skąd wziąć potrzebne przedmioty**
**Bounce Gems**\
\
Dostępne w Reward Shop za 10 000 Reward Tokens.\
Reward Tokens można zdobywać poprzez:
* Wykonywanie tasków
* Udział w arenach
* Misje w Elden City
* Questy
* Zbieranie i sprzedawanie lootu
* Wymiane loota na Loot Points na statule przy Rashidzie
**Explosion Gems**
* Dostępne w Task Shop za 15000 Task Tokens za sztukę
**UE Damage Points**
* Również w Task Shop – **2,000 Task Tokens za punkt**.
# System ELO
#### 🏆 ELO System – Rywalizuj, Wspinaj się i Zwyciężaj!
System ELO to mechanika rankingowa i punktowa inspirowana grami w stylu MOBA, stworzona, aby mierzyć Twój postęp zarówno w PvP, jak i PvE.
***
**🔹 Jak to działa**
Twoje punkty ELO rosną lub maleją w zależności od zwycięstw lub porażek.\
System automatycznie dobiera przeciwników w zakresie Twojego poziomu (±500 poziomów), aby zapewnić wyrównane walki.\
Poziom przeciwnika w stosunku do Twojego decyduje o zysku lub stracie ELO:
* Zabicie gracza wyższego poziomu → większy przyrost ELO
* Zabicie gracza niższego poziomu → mniejszy lub brak przyrostu
***
**📅 Sezony ELO**
Każdy sezon trwa miesiąc.\
Na koniec sezonu gracze z najwyższym ELO otrzymują specjalne nagrody.\
Nagrody i rankingi mogą się różnić w zależności od edycji.\
Timer sezonu można śledzić zarówno w grze, jak i na stronie internetowej – aktualizuje się automatycznie.\
🔗 [Check current ELO standings](https://eloria.pl/?elo)
Licznik sezonu ELO
***
**🥇 Rangi ELO**
W miarę zdobywania punktów ELO, Twój ranking ewoluuje, odzwierciedlając osiągnięcia.\
Twój ranking jest widoczny, gdy ktoś przegląda Twoją postać.\
Każdy gracz zaczyna od rangi Bronze, ale może wspinać się wyżej dzięki konsekwentnym zwycięstwom.
***
**💎 League Sklep – Ekskluzywne nagrody ELO**
Możesz wydawać League Points (zdobywane w trakcie sezonu) w specjalnym ELO Shop dostępnym tylko na oficjalnej stronie.\
Najważniejsze informacje:
* Oferta sklepu zmienia się co miesiąc, zgodnie z sezonem ELO
* Ekskluzywne i unikalne nagrody – niedostępne nigdzie indziej w grze
| Eksluzywny Trinket | Ekskluzywny Mount | Ekskluzywny Addon | Ekskluzywny Item |
| ----------------------------------------------------------------------------------------------------------------------------------------------------------------------------------------------------------------------------------------------------------------------------------------- | ----------------------------------------------------------------------------------------------------------------------------------------------------------------------------------------------------------------------------------------------------------------------------------------- | ----------------------------------------------------------------------------------------------------------------------------------------------------------------------------------------------------------------------------------------------------------------------------------------- | ----------------------------------------------------------------------------------------------------------------------------------------------------------------------------------------------------------------------------------------------------------------------------------------- |
|
|
|
|
|
# Zaufany Kupiec
#### 💎 System lojalności - Zarabiaj więcej, sprzedając mądrze
System Lojalności pozwala zbierać Loot Points za każdym razem, gdy sprzedajesz przedmioty NPC Rashidowi.\
Te punkty można później wymienić na cenne nagrody w grze.
***
**💰 Jak to działa**
Za każde 1 000 złota wartości loot’u sprzedanego Rashidowi automatycznie otrzymujesz 1 Loot Point.\
Proces jest w pełni automatyczny – wystarczy sprzedawać przedmioty jak zwykle, a punkty zostaną dodane do Twojego konta.
Loot Points info
***
**🎁 Na co można wymienić punkty?**
Niedaleko Rashida możesz wymienić Loot Points na:
* **Reward Token** – koszt 1 000 Loot Points (najlepszy sposób na zdobywanie Reward Tokens)
* **Ekskluzywny wierzchowiec**
* **Ekskluzywny strój**
Sklep Loot Points
# System Skill & Perk
#### System Perków - Zwiększaj moc dzięki postępowi
System Perków pozwala jeszcze bardziej wzmocnić Twoją postać, inwestując punkty w unikalne pasywne bonusy.
Statua Skills & Perk
***
**🔹 Jak to działa**
* Za każde 50 poziomów dostajesz 1 Perk Point.
* Interakcja ze statuą pozwala wybrać perk z listy i przypisać do niego punkt.
* Możesz zainwestować do 20 punktów w pojedynczy perk, wzmacniając go przy każdej aktualizacji.
Wszystkie Skille i Perki są dostępne z widoku strony - profilu gracza
***
**🔹 Inne sposoby zdobywania Perk Points**
* Z loot chestów pojawiających się w Thais/Elden City (czasami mogą nagrodzić Perk Points)
* Wykonując questy
***
**🔹 Popełniłeś błąd?**
Jeśli przypadkowo przypiszesz punkt w złe miejsce, nie martw się!\
Cały Skill & Perk System można zresetować w dowolnym momencie poprzez TC Store.
Skill and Perk Reset dostepny w TC store
# Kryjówka (Guild Hideout)
#### 🏰 Kryjówka gildii & Rzemiosło w Skarbcu
Kryjówka gildii to nie tylko dom Twojej frakcji, ale też potężne centrum rzemiosła, gdzie współpraca naprawdę się opłaca.\
Poprzez **Guild Treasury** Ty i członkowie Twojej gildii możecie deponować zasoby, odblokowywać poziomy rzemiosła i tworzyć ekskluzywny sprzęt wysokiego poziomu.
***
**💰 Dostęp do Guild Treasury**
W kryjówce gildii znajdziesz dedykowanego NPC/interfejs zwanego **Guild Treasury**.\
Każdy członek gildii może tutaj:
* **Depozyt Reward Tokens** – przyczyniać się do wspólnego postępu gildii.
* **Depozyt złota** – przekazywać fundusze bezpośrednio z konta bankowego.\
\
💡 Wszystkie wkłady trafiają do wspólnego skarbca i są wykorzystywane do odblokowywania recept i ulepszeń rzemieślniczych.
***
**⚙️ Jak działa system poziomów (Tier System)**
Poziom gildii decyduje, które opcje rzemiosła i przedmioty są dostępne.\
Każdy poziom odblokowuje nowe zestawy broni, zbroi, plecaków i specjalnych przedmiotów dostępnych wyłącznie dzięki postępowi gildii.
Tiery Kryjówki - pozwalają na wymiane coraz to lepszych przedmiotów
***
**💎 Waluty rzemieślnicze**
* **Główna waluta:** Extracted Strengths – zdobywana przez sprzedaż przedmiotów w kryjówce gildii.
* **Dodatkowe waluty:** Gold Tokens & Grand Stones – używane do tworzenia plecaków i specjalnych przedmiotów wysokiego poziomu.
***
#### 🏆 Przegląd poziomów rzemiosła
**Tier 1 – Guild Level 1+ ⚔️**
* Odblokowuje Soul Items (np. Soulcutter, Souleater)
* Koszt: 2× Extracted Strengths
**Tier 2 – Guild Level 2+ 🔮**
* Odblokowuje Primal Items (np. Alicorn, Arboreal, Arcanomancer)
* Koszt: 4× Extracted Strengths
**Tier 3 – Guild Level 3+ 💰**
* Odblokowuje crafting Chronobag i Mystery Bag
* Waluty: Gold Tokens & Elder Stones
**Tier 4 – Guild Level 4+ ⚡**
* Odblokowuje zestawy poziom 1200 dla wszystkich profesji (Knight, Druid, Sorcerer, Paladin)
* Koszt: 40× Extracted Strengths
**Tier 5 – Guild Level 5+ 🩸**
* Odblokowuje Sanguine Items i ich wersje Grand
* Koszt: 30–60× Extracted Strengths
**Tier 6 – Guild Level 6+ 🌙**
* Odblokowuje Eternal Bag (tworzony przy użyciu Elder Stones)
* Odblokowuje zestawy poziom 2500 dla wszystkich profesji
* Koszt: 80× Extracted Strengths
**Tier 7 – Guild Level 7+ 🔥**
* Odblokowuje Endgame Armor & Weapons dla wszystkich profesji
* Koszt: 240× Extracted Strengths
***
💡 Im więcej gildia wnosi wkładów, tym szybciej przechodzi przez poziomy — odblokowując potężny nowy sprzęt i opcje rzemiosła dla całego zespołu.
# Eteryczny Kowal
### 🛠️ Przewodnik po rzemiośle Upgrade Item
#### 🔹 Wymagane przedmioty
Aby rozpocząć proces ulepszania, potrzebujesz:
* Hexbound Coffer
* Sunvault Core
* Ethereal Crystal
* Frozen Prism
* Runed Reliquary
* Infernal Vault
* Crimson Cache
* Gleaming Core
* Glinting Shard
All crystals required for crafting
***
#### 🔹 Tworzenie Upgrade Item - Poziom 1
1. Podejdź do NPC **Ethereal Blacksmith**.
2. Wprowadź w oknie czatu następujące komendy:\
`hi → craft → yes`
3. Otrzymasz **Upgrade Item Level 1**.
**📌 Możliwe do użycia na:**
* Helmet
* Armor
* BP
* Legs
* Boots
* Shield/Quiver/Spellbook
* Weapon
Upgrade Item Level 1
***
#### 🔹 Tworzenia wyższych poziomów Upgrade Item
Proces jest prosty: połącz 2 przedmioty tego samego poziomu, aby uzyskać 1 przedmiot wyższego poziomu.
**Kroki:**
* 2× Upgrade Item Level 1 → Upgrade Item Level 2\
*Dialog: `hi → combine level 1`*
* 2× Upgrade Item Level 2 → Upgrade Item Level 3
* 2× Upgrade Item Level 3 → Upgrade Item Level 4
* …kontynuuj aż do **Upgrade Item Level 10**
**Schemat łączenia:**
* Poziom 1 = tworzone bezpośrednio u NPC
* Poziomy 2–10 = łączenie 2 przedmiotów z poprzedniego poziomu
**Przykład:**\
Masz 4× Upgrade Item Level 1:
* Połącz 2 → 1× Level 2
* Połącz kolejne 2 → 1× Level 2
* Połącz oba Level 2 → 1× Level 3
Wszystkie możliwe Upgrade Item
# System Lochów (Dungeons)
### 🏰 System Dungeon - Zdobywaj głębiny Elorii
System Dungeon w Eloria oferuje jedne z najbardziej satysfakcjonujących treści endgame — wymagające walki, unikalne mechaniki i wartościowy loot.\
Do dyspozycji masz **10 różnych lochów**, każdy z różnymi poziomami trudności i tierami potworów.
Dungeon Room - wejście
Dungeon Room - wybór Dungeonu
***
#### 🔹 Wymagania wejścia
Aby wejść do lochu, potrzebujesz od **2 do 13 Boss Tokens**.\
Tokeny można zdobyć od wszystkich bossów w Boss Rooms w całej Elorii.\
Dodatkowo, istnieje **cooldown dla każdego z lochów – 12 godzin**.
***
#### 🔹 Typy lochów
Każdy loch zawiera potwory z różnych tierów i środowisk, w tym:
* Lunar Monsters
* Eclipse Monsters
* 2k Lunar Monsters
* 2k Eclipse Monsters
* Lunar Lords
* Eclipse Lords
* 5k Monsters (znajdujące się w dolnej części Elden Room)
***
#### 🔹 Mechanika lochów
Wszystkie lochy mają podobny układ i mechanikę:
**Wejście do lochu**\
Po wejściu zwracaj uwagę na kanał **Server Log**.\
Będzie wyświetlał wskazówki, gdzie pojawi się następny miniboss — na wschodzie (East) lub zachodzie (West).
**Spotkania z minibossami**\
Każdy loch zawiera **3 minibossów**.\
Wyglądają jak zwykłe potwory, ale mają:
* czerwone imię
* dodatkowy prefix w nazwie
* wzmocnione statystyki i obrażenia
Pokonanie wszystkich trzech minibossów uruchamia walkę z **final boss**.
**Dungeon Boss**\
Po pokonaniu minibossów zostaniesz przeteleportowany do pokoju bossa.\
Boss upuszcza loot, więc upewnij się, że zbierzesz go ręcznie.\
Po pokonaniu pojawi się **gold chest**.
**Nagrody i wyjście**\
Kliknięcie złotej skrzyni teleportuje Cię z powrotem do głównego wyboru lochów.\
Otrzymasz również nagrodę do plecaka:
* **Elder Stone** (możliwe do wymiany w Guild Hideout na 1.2k / 2.5k / 4k Bags)\
Istnieje też niewielka szansa, że otrzymasz bezpośrednio torbę zamiast kamienia.
***
#### 🔹 Bonusowe nagrody – Dark Stars
Oprócz głównego lootu, ukończenie lochu nagradza **Dark Stars** — specjalną walutą wyświetlaną pod Twoim nickiem.\
\
Dark Stars można użyć do otwierania **Reward Chests** po prawej stronie pokoju lochu.
| Skrzynie z nagrodami 1&2 | Skrzynia z nagrodami 7 wraz z wymaganiami |
| ----------------------------------------------------------------------------------------------------------------------------------------------------------------------------------------------------------------------------------------------------------------------------------------------------- | ----------------------------------------------------------------------------------------------------------------------------------------------------------------------------------------------------------------------------------------------------------------------------------------------------- |
|
|
|
**Możliwe nagrody:**
* 📜 **Bonelord Tome** (+20 Levels)
* 🎒 **Bag You Desire / Bag You Covet**
* 💎 **Primal Bags**
* 🥇 **Arena Tokens**
* ⚗️ Inne wartościowe i rzadkie przedmioty
***
💡 **Tip:**\
Im wyższy tier lochu, tym lepsze nagrody — ale też trudniejsi przeciwnicy.\
Weź ze sobą silne imbuementy, ulepszony sprzęt i mocny ekwipunek, aby osiągnąć najlepsze wyniki.
# System Bossów Questowych
### 🔮 System Fate Keeper - Opanuj questy i odblokuj potężnych bossów
Fate Keeper to Twój przewodnik po wszystkich głównych questach i odblokowywaniu bossów w Eloria.\
Dzięki temu systemowi możesz śledzić postęp w questach, zdobywać nagrody i odblokowywać endgame bossów, zbierając **Quest Points**.
NPC **Fate Keeper** stoi jako strażnik postępu — obserwuje podróż każdego awanturnika.
Fate Keeper NPC w Quests Room
***
#### ⚔️ Czym są Quest Points?
Za ukończenie każdego wymienionego questu otrzymujesz określoną liczbę **Quest Points**.\
Punkty te są walutą postępu w systemie Fate Keeper.\
Twój całkowity wynik decyduje o:
* Których bossów możesz wyzwać
* Jakie nagrody możesz odebrać
* Twoim rankingu awanturnika
Maksymalnie możesz posiadać **15 Quest Points**.
***
#### 🗺️ Sprawdzanie postępu
Porozmawiaj z Fate Keeper i użyj następujących komend w oknie czatu:
* `hi → status` – Wyświetla Twój całkowity postęp i statystyki
* `hi → rewards` – Sprawdź, które nagrody zostały odblokowane lub są bliskie odblokowania
* `hi → quests` – Zobacz listę dostępnych questów i wartość punktową
* `hi → bosses` – Sprawdź, którzy bossowie są zablokowani lub odblokowani i ile punktów potrzeba, by uzyskać dostęp
* `hi → claim all` – Natychmiast odbierz wszystkie dostępne nagrody
***
#### 📜 Kategorie questów
Questy dzielą się na trzy poziomy trudności, każdy przyznaje **1 Quest Point**:
**Easy Quests:**
* Arena Greenhorn
* Arena Scrapper
* Arena Warlord
* Magic Longsword
* One Out of Four
**Medium Quests:**
* Tomreil Access Quest
* Hardcore Inquisition (INQ)
* Hardcore Pits of Inferno (POI)
**Hard Quests:**
* Hightower Quest
* Lost Souls Quest
* Highwater Quest
* Golden Hand
* Secrets in the Sandstone
* Cavern of Echoes
* Inferno Depths
*(Każdy ukończony quest jest oznaczony jako \[DONE] w menu Fate Keeper.)*
***
#### 👑 Postęp odblokowania bossów
Ukończenie questów stopniowo odblokowuje dostęp do potężnych bossów.\
Każdy boss wymaga określonej liczby Quest Points, by go wyzwać.:
| Boss Name | Tier | Wymagane Punkty | Opis |
| ---------------------- | ------------ | --------------- | -------------------------------------------------------------------------------------- |
| **Echoing Oblivion** | Beginner | 6 | **Najsłabszy z bossów Oblivion — świetny punkt startowy.** |
| **Inferno Oblivion** | Intermediate | 12 | **Groźny przeciwnik, który sprawdza Twoją rosnącą siłę.** |
| **Forgotten Empress** | Advanced | 14 | **Starożytna istota o ogromnej mocy. Tylko doświadczeni awanturnicy mogą ją pokonać.** |
| **Veil Queen of Ruin** | Legendary | 15 | **Ostateczne wyzwanie — zmierz się z nią dopiero po opanowaniu wszystkich questów.** |
Forgotten Empress i Veil Queen Of Ruin
Echoing Oblivion i Inferno Oblivion
***
💎 **Nagrody z Bossów**
Każdy z bossów daje wartościowy loot, w tym:
* **Boss Tokens** – używane do wysokopoziomowego rzemiosła i dostępu
* **UE Upgrade Scrolls** – wzmacniają moc twojego ultimate spell
* **1.2k / 2.5k / 4k Equipment Bags** – wypełnione rzadkimi przedmiotami dopasowanymi do profesji
* Dodatkowe unikalne nagrody – rzadkie materiały, przedmioty kosmetyczne i komponenty ulepszeń
***
#### 🎁 Nagrody progresu
Zbierając Quest Points, odblokowujesz nagrody za postęp przy określonych kamieniach milowych:
* **Novice Adventurer Reward** – odblokowywana po 3 Quest Points
* **Skilled Adventurer Reward** – odblokowywana po 7 Quest Points
* **Master Adventurer Reward** – odblokowywana po 15 Quest Points
Każdy poziom nagród daje coraz lepsze przedmioty — od mikstur i tokenów po potężne przedmioty ulepszające.\
\
Aby zobaczyć lub odebrać nagrody, użyj:\
`hi → rewards` lub `hi → claim all`
***
#### 🌟 Podsumowanie
* Ukończ questy → Zdobywaj Quest Points
* Zdobywaj punkty → Odblokowuj silniejszych bossów
* Pokonuj bossów → Odbieraj rzadki loot i wartościowe nagrody
* Kamienie milowe postępu → Odblokowuj nagrody awanturnika
* Wyzwania Fate Keeper → Stań się prawdziwym mistrzem Elorii
# Reputacja Elden
System Reputacji – Odblokuj potężne strefy polowań
W grze istnieje specjalny system reputacji, który pozwala graczom uzyskiwać dostęp do coraz potężniejszych stref polowań, znanych jako **uber respawns**.
Aby zdobywać reputację, gracze mogą wykonywać różnorodne zadania dla trzech kluczowych NPC:
:hammer: Gravelbeard – Górnik \
Przynoś kamienie wydobyte z kamieniołomu i pomagaj Gravelbeardowi w pracach związanych z górnictwem, aby zdobyć jego zaufanie.
Droga do Gravelbearda w Elden City
:fishing\_pole\_and\_fish: Salty Sam – Rybak
\
Pomagaj Salty Samowi, łowiąc ryby i dostarczając rzadkie okazy. Popraw swoje umiejętności wędkarskie, aby odblokować specjalne zlecenia.
Droga do Salty Sama w Elden City
:brain: Perceptor – Uczony
\
Zbieraj i dostarczaj mu określone przedmioty — artefakty, księgi, składniki alchemiczne — aby wspierać jego badania. Czasami oferuje również specjalne misje eksploracyjne.
Droga do Perceptora w Elden City - jest nad schodami :)
🎰 Codzienna ruletka\
Po ciężkiej pracy warto też zadbać o przyjemności. Po wykonaniu misji nie zapomnij zagrać w ruletkę i zdobyć fantastyczne nagrody!
Ruletka dostępna w Elden City DP +2
***
:chart\_with\_upwards\_trend: Korzyści z reputacji
\
Zdobyta reputacja umożliwia dostęp do **uber respawns**, gdzie czekają potężne potwory, rzadkie dropy i cenne nagrody.\
Każdy poziom reputacji odblokowuje nowe możliwości eksploracji:\
\
:unlock:Lista dostępu według poziomu reputacji:
| Required Reputation level | Unlocked Monster |
| ------------------------------------------ | ----------------- |
| 100 | Norg |
| 250 | Daemon |
| 400 | Apophis |
| 600 | Marchosias |
| 850 | Blight Paladin |
| 1100 | Zyr Naal |
| 1100 | Fireborne Wretch |
| 1100 | Moonshard Apostle |
| 1100 | Azureborn Wretch |
| **2000 (Wymaga również specjalnej areny)** | The Horned Sorrow |
| **2000 (Wymaga również specjalnej areny)** | Arachmourne |
Stary ELDER Room (Potwory za reputacje)
***
📜Podsumowanie\
System reputacji zachęca graczy do eksplorowania różnych aspektów gry — górnictwa, wędkowania i zbieractwa — i służy jako brama do elitarnych stref polowań.\
Wybierz swoją ścieżkę, buduj reputację i odblokuj dostęp do najniebezpieczniejszych i najbardziej nagradzających obszarów w grze!
Nowy ELDER Room - To dopiero początek..
# \[Tutoriale]
Witajcie, Poszukiwacze Przygód!\
\
To sekcja stworzona **dla graczy — przez graczy**.\
Zapoznajcie się z nią, jeśli chcecie **szybciej robić postępy** :)
# Przewodnik dla początkującego by Shadovv
**👋 Witaj, Nowy Graczu!**\
Witamy w Eloria OTS — cieszę się, że tu jesteś 🙂\
Ten krótki poradnik pomoże Ci przejść początkowe etapy gry i pokaże jasną ścieżkę do efektywnego progresu.\
Jeśli zastanawiasz się, jak zacząć na tak spersonalizowanej mapie, czytaj dalej 👇
***
#### ⚔️ Trening
Po pierwszym zalogowaniu musisz wytrenować swoje umiejętności.\
W Eloria OTS dostępne są różne opcje:
**a) Training Monks**
* Możesz trenować tutaj za darmo.
* Atakuj customowych mnichów, aby podnosić swoje umiejętności.
**b) Exercise Dummy (zalecane)**
* Nowi gracze mogą otrzymać darmową broń treningową komendą `!gift`.
* Później nowe bronie treningowe można kupić u NPC **Mirabella** w Thais Temple.
* Dostępne są dwa dummy: jeden przy lewym wejściu do DP, drugi w Thais Temple (+1 piętro).
**c) Lepsze Exercise Dummies**
* +10% Dummy – dostępny w TC Store (można rozpakować w domu)
* +30% Dummy – DP+1 (szary teleport). Opłata wejściowa: 100kk, trening przez 24h (do server save o 5:00). X-log działa.
* +20% Dummy – odblokowany po zdobyciu 200 punktów reputacji w Elden City. Darmowy w użyciu.
***
#### 🧪 Imbuements
Imbuements są jednym z najważniejszych elementów progresu postaci.\
✅ Nie musisz zbierać przedmiotów ręcznie!\
Porozmawiaj z NPC przy lewym wejściu do Thais DP i powiedz:\
`Hi → Imbuement Packages → Void / Vampirism / Epiphany`\
Następnie użyj paczki na sprzęcie przy **imbruimng shrine**.
**Rekomendowane konfiguracje:**
* Helmet: Void + Epiphany
* Armor: Vampirism + Elemental Damage (zależnie od polowanych potworów)
* Weapon: Void + Vampirism + Strike
(Później możesz zastąpić Void Precision lub innym imbue, jeśli stanie się mniej efektywne.)
***
#### 🧬 Skill & Perk System
Pełny przewodnik: 🔗 Skill & Perk System | Eloria Wiki\
**Polecany porządek inwestowania punktów:**
* 10× w Potion Upgrade
* 20× w DMG Upgrade
* 20× w XP Upgrade\
Następnie:
* EK/RP → +20 HP
* ED/MS → +20 Mana\
Reszta zależy od Twojego stylu gry i priorytetu w levelowaniu.
***
#### 📜 Tasks
Tasks są jednym z głównych systemów w Eloria OTS.\
Za ich wykonanie zdobywasz: **Reward Tokens** i **Hunting Task Tokens**, które można wymienić na:
* Outfity i wierzchowce
* Exalted Cores (do tierowania)
* Arrow Slot Items
* %Potions
* UE Upgrade Points (najcenniejsza nagroda)
***
#### 🧭 Ścieżka progresu poziomów
**Poziom 1–150** → Rotworms → Dragons → Dragon Lords\
**Poziom 150–400** → Grim Reapers / Werehyenas / Asuras\
**Poziom 400–500** → Wardragons / Bultasaurs (!task HARD 20 Years…)\
**Poziom 500** → Kup %Potion w Reward Token Shop (Thais DP, lewa skrzynia – 50 Reward Tokens). Następnie startuj z Arenami.
**Areny i polowania:**
* Po pokonaniu Level 3 Eclipse Mix Arena → Manyhands (idealne na ten etap)
* Jeśli zadają za dużo obrażeń → użyj def prey 10/10
* Poziom 1200 → Battlemages (wymaga pokonania Level 5 Eclipse Mix Arena)
* Poziom 2000+ → Eclipse Mix 2k / Lunar Mix 2k Arenas:
* Eclipse Mix 2k → odblokowuje Lilith i Pindleskin
* Lunar Mix 2k → odblokowuje Leapers i Blood Hawks
**Poziom 3000+** → zalecane polowania drużynowe:
* Commoners – odblokowane przez Eclipse Lords Arena
* Beastmen of Azazula – odblokowane przez Lunar Lords Arena\
(Pokonaj co najmniej Level 20 w odpowiednich arenach.)
**Poziom 2500–3000** → skup się na ukończeniu wszystkich Aren:
* Eclipse Mix, Lunar Mix, Eclipse Mix 2k, Lunar Mix 2k, Lunar Lords Mix, Eclipse Lords Mix\
To odblokowuje specjalne buffy zwiększające przeżywalność i efektywność.
***
#### 🛡️ Progres sprzętu
Na początku nie przejmuj się zbytnio ekwipunkiem — imbuements są ważniejsze.\
Nawet z podstawowym sprzętem na poziomie 200–400, jeśli przedmioty są imbued, wszystko jest w porządku.
**Poziom 400:**
* Ukończ Svargrond Arena Quest (custom Eloria)
* Level 1 → Gnome Set
* Level 2 → Lion Set
* Level 3 → Falcon Set
**Kupowanie i craftowanie:**
* Soul Items (Tier 1 Hideout)
* Primal Items (Tier 2 Hideout)
* Sanguine Items (Tier 5 Hideout)
**Inne źródła:**
* Elden Lord Boss → dropy Soulwar, Primal i Sanguine Bags (Thais DP +1 green teleport)
* Soulwar Quest (classic reward system)
* Primal Bag → drop z Magma Bubble boss
**Do poziomu 1200** te przedmioty są najlepsze.
***
#### 🔥 Poziom 1200+ sprzęt
* Custom sety zwiększające UE spells
* Źródła:
* First Dragon Boss (respawn co 20h) → Chrono Bags i Mystery Bags
* Hideout Tier 3 → wymiana Gold Tokens (100/125) lub 10 Grand Stones
* Dungeon Rewards → szansa na Grand Stones lub torby
* Hardcore INQ / POI Quests → gwarantowane Chrono & Mystery Bags
***
#### 🌙 Poziom 2500+ i dalej
* Silniejszy sprzęt na 2.5k level zdobywamy przez questy lub wymiane Grand Stone na worki w Hideout (20/40 za bag)
* Poziom 4000+ → nagroda za Elden Level (Reborn 5000lvl) i specjalne endgame questy
***
#### 💬 Na zakończenie
To wszystko na dziś!\
Jeśli napotkasz problemy lub masz pytania — nie wahaj się pytać.\
Chętnie pomożemy 🙂
# Wheel of Destiny
Skill Wheel - miejsce gdzie możesz dodać swoje punkty
Możesz teraz zdobywać **Skill Wheel Points** poprzez różne aktywności w grze.
Oto kilka przykładów miejsc, gdzie można je znaleźć:
* 🧟♂️ **Pokonywanie bossów** – punkty mogą wpaść w loot bossa
* 🎯 **Hunting Task Shop** – dostępne jako nagrody
* 🗝️ **Skrzynie** – rozsiane po świecie gry
* 🛡️ **Reputation Missions** – ich ukończenie może dawać punkty
* 🎰 **Nagrody z loterii** – przy losowaniach za Dungeon Points
Ikonka Wheel of Destiny, jezeli brakuje - sprawdz Ustawienia --> Interface --> Control Buttons
Zwoje Skill Wheel
Dodatkowo, **Scrolls** mogą wypadać z ulepszonych potworów, które mają **0,2%–0,7% szansy** pojawienia się przy spawnie potwora
Ulepszone potwory
# Wheel of Destiny - Gem Atelier
Tutorial jak rozdawać swoje punkty ze zwojów
#### **RP (Royal Paladin)**
* Otwieramy ścieżki we wszystkich kierunkach (**zielony kolor**)
* Priorytet: **Mas San** – dwa ulepszenia tego typu na kole (**czerwony kolor**)
* Odblokowujemy ścieżki gniazd klejnotów (**żółty kolor**)
* Dodajemy buffy zaklęć profesji (**różowy kolor**)
* Dodajemy pozostałe buffy (głównie skills + life leech) (**pomarańczowy kolor**)
* Zamykamy koło — najlepsza kolejność maksowania: **lewy dolny → prawy dolny → lewy górny → prawy górny**\
*(Utevo Grav San dodaje dodatkowe mocne obrażenia 🙂)*
RP Wheel
***
#### **MS (Master Sorcerer)**
* Otwieramy ścieżki we wszystkich kierunkach (**zielony**)
* Priorytet: **UE buff** – trzy na kole (**czerwony**)
* Odblokowujemy ścieżki gniazd klejnotów (**żółty**)
* Dodajemy pozostałe buffy (Mana Leech + Skill) (**pomarańczowy**)
* Zamykamy koło — kolejność: **top right → bottom left → bottom right → top left**\
*(EXORI MOE i EXORI KOR są potężne!)*
MS Wheel
***
#### **ED (Elder Druid)**
* Otwieramy ścieżki we wszystkich kierunkach (**zielony**)
* ED nie ma priorytetowego UE buffa — brak specjalnej sekcji na kole
* Odblokowujemy ścieżki gniazd klejnotów (**żółty**)
* Dodajemy pozostałe buffy (Mana Leech + Skill) (**pomarańczowy**)
* Zamykamy koło — kolejność maksowania: **bottom right → top left → bottom left → top right**
ED Wheel
***
#### EK (Elite Knight)
* Otwieramy ścieżki we wszystkich kierunkach (**zielony**)
* Priorytet: **Exori Gran** – dwa ulepszenia tego typu na kole (**czerwony**)
* Odblokowujemy ścieżki gniazd klejnotów (**żółty**)
* Dodajemy buffy zaklęć profesji (**różowy**)
* Dodajemy pozostałe buffy (głównie skills + life leech) (**pomarańczowy**)
* Zamykamy koło — kolejność maksowania: **lewy dolny → prawy dolny → lewy górny → prawy górny**
EK Wheel
***
#### 💎 GEMS — Prawdziwa moc na OTS
Gemy są kluczowe, ponieważ Twój sprzęt również wzmacnia zaklęcia profesji.
**Rodzaje gemów:**
* Marksman Gem → RP
* Sage Gem → MS
* Guardian Gem → EK
* Mystic Gem → ED
**Poziomy gemów:**
1. Lesser Gem
2. Gem
3. Greater Gem
Nie inwestuj w Lesser ani zwykłe gemy — dają tylko buffy ochronne, bez zwiększenia obrażeń.\
Celuj w **Greater Gem** 🙂
**Użycie w Gem Atelier:**
* Udaj się do **Temple**, przy statui Perk Points
* Otwórz Wheel → GEM ATELIER → swoje zebrane kryształy będziesz mieć po lewej
* Mając **Greater Marksman Gem**, kliknij **Reveal** (koszt 6kk) → wygeneruje gem po prawej z buffem
Max Gem Atelier na RP
***
#### ⚔️ Najbardziej pożądane buffy:
* **RP:** BASE DMG Aug Divine Caldera → Exevo Mas San
* **EK:** BASE DMG Aug Fierce Berserk → Exori Gran
* **MS:** BASE DMG Aug Hell’s Core i Aug Rage of the Skies → Exevo Gran Mas Flam / Exevo Gran Mas Vis
* **ED:** BASE DMG Aug Eternal Winter → Mas Frigo
Każdy buff ma domyślną wartość, więc nie wymieniaj ich na inne typy kamieni.\
Możesz mieć **cztery identyczne buffy**, po jednym na każdą część koła!
**Wzmacnianie gemów:**
* Używaj **Greater Gem Fragments** (zdobywane przez rozkładanie niechcianych gemów)
* Maksuj buffy na gemie po prawej stronie Wheel, aby zwiększyć jego moc.
Fragment Workshop (buffowanie kryształu)
# Hardcore POI
#### 🔥 Wymagania wejściowe na questa
Zanim przystąpisz do wyzwania, upewnij się, że spełniasz następujące warunki:
* ✅ Ukończony podstawowy quest **Pits of Inferno**
* ✅ Minimum **poziom 1200**
* ✅ Wszystkie nagrody z podstawowego **Pits of Inferno** muszą być odebrane
***
**🎁 Nagroda**
Torba zawierająca EQ na **poziom 1200+** 🧳⚔️
***
**📍 Jak uzyskać dostęp do Questa**
* Udaj się do miasta **Frogswell**
* Lub użyj **teleportu w pokoju questowym**
Droga do Questa
Hardcore POI quest!
# Hardcore INQ
#### 🛡️ Wyzwanie dla Prawdziwego Weterana!
Myślisz, że widziałeś już wszystko? Czas to udowodnić.\
Ta misja przywraca klasyczny **Inquisition Quest (INQ)** — całkowicie odświeżony w nowoczesnym, wysokopoziomowym wydaniu.\
Spodziewaj się intensywnych walk, wymagających mechanik i niezapomnianej epickiej atmosfery Eloria.
***
**🔹** Wymagania
* ✅ Ukończony **Inquisition Quest (INQ)**
* ✅ Ukończony podstawowy **Pits of Inferno Quest**
* ✅ Minimalny **poziom 1200**
***
**🎁** Nagroda
* Torba zawierająca EQ na **poziom 1200+** 🧳⚔️
***
🔥 Wejdź do piekła i pokaż, z czego składa się prawdziwy weteran!
Droga na Questa
Hardcore INQ quest!
# Imbuements
Porozmawiajmy o **imbuements** — jednym z najsilniejszych wzmocnień, zarówno na początku gry, jak i w endgame.
***
**🔹** Czy warto je stosować?
**KRÓTKA ODPOWIEDŹ:** TAK, TAK I ABSOLUTNIE TAK! 💪\
Imbuements są niezbędne — wzmacniają postać, ułatwiają polowania i przyspieszają progres.
***
**🔹** Najważniejsze imbuements na start
* 🩸 **Life Leech** – leczy cię, gdy zadajesz obrażenia
* 🔮 **Mana Leech** – przywraca manę przy zadawaniu obrażeń
* ⚔️ **Strike** – dodaje 50% obrażeń krytycznych z 10% szansą
Na początku gry stosuj imbuements na swoim sprzęcie tak szybko, jak to możliwe, pod warunkiem że przedmiot na to pozwala.\
Najczęściej można ich używać na: **hełmy, zbroje i bronie**.\
Są bardzo przystępne cenowo i sprawiają, że gra staje się płynniejsza, szybciej zdobywasz poziomy i łatwiej radzisz sobie z trudniejszymi potworami.
***
#### 🔹Gdzie stosować imbuements
* W **Thais Depot**, po lewej stronie
***
**🔹** Zdobywanie materiałów do imbuements
Porozmawiaj z NPC **Imbuement Assistant** i powiedz:\
`hi → imbuement packages → strike / void / vampirism`\
Otrzymasz od razu torbę ze wszystkimi potrzebnymi materiałami.
***
Imbuements to kluczowy element gry, zwłaszcza przy **custom monsterach**, które zadają mocniejsze obrażenia i gubią lepsze łupy — nie pomijaj ich, jeśli chcesz być krok przed innymi! ⚔️✨
Imbuement Assistant w Thais depot
# Elden Reputation - Wydobywanie Kamieni
#### ⛏️ Misja: Wydobywanie Kamieni w Kamieniołomie
Aby rozpocząć misję, udaj się do NPC **Gravelbeard**, po lewej stronie depotu w Elden City.\
Powiedz do niego:\
`hi → mission`\
Powie Ci, jakie kamienie są potrzebne danego dnia.
***
#### 🔹 Rodzaje Kamieni (losowe każdego dnia)
* **Death Stone**
* **Fire Stone**
* **Holy Stone**
* **Tera Stone**
* **Ice Stone**
* **Energy Stone**
***
#### 🔹 Przygotowanie
* Kup **Ice Thawing Pick** (kilof) od Gravelbearda, mówiąc `trade`
* Wejdź do kopalni przez **czerwony teleport** obok NPC, zejdź po schodach i rozpocznij wydobycie
***
#### 🔹 Wydobywanie Kamieni
* Użyj kilofa na **białych skałach** w kopalni
* Szansa na drop jest niska, więc przygotuj się na trochę biegania
* W system wbudowany jest mechanizm szczęścia — po każdym użyciu zobaczysz komunikat w **Server Log**
* Jeśli pojawi się komunikat: `"You can’t mine here"`, przejdź do innej skały i spróbuj ponownie
***
#### 🔹 Zakończenie Misji
Po zebraniu wszystkich wymaganych kamieni, wróć do Gravelbearda i powiedz:\
`hi → complete`
***
#### 🎁 Nagrody
* Losowe punkty **Reputation** (7–35)
* 10 **ELO points**
* **Reward & Task Tokens**
* **Wheel Scrolls**
NPC Gravelbeard
# Elden Reputation - Łowienie
#### 🎣 Mission: Łowienie ryb
Udaj się do **Salty Sam**, rybaka NPC znajdującego się kilka kafelków na północ od Gravelbearda w Elden City.\
Aby rozpocząć misję, powiedz:\
`hi → mission`\
Po złowieniu wszystkich wymaganych ryb, zakończ misję:\
`hi → complete`
***
**🔹 W**ymagane ryby (losowe każdego dnia)
 **Shimmer Swimmer**
* Lokalizacja: Brudna woda w południowym Venore (dostępna również w Elden City)
* Wymagania: **Fishing Rod + Worms** (kup u NPC Mirabella → type: tools)
 **Old Nasty**
* Lokalizacja: Tak samo jak Shimmer Swimmer (dostępna także w Elden City)
* Wymagania: Fishing Rod + Worms
 **Northern Pike**
* Lokalizacja: Otwory lodowe w Svargrond (również dostępne w Elden City)
* Wymagania: Zwykły kilof do rozbijania lodu + Fishing Rod
 **Rainbow Trout**
* Lokalizacja: Lodowce Svargrond (również dostępne w Elden City)
* Wymagania: Kilof + Fishing Rod \_ Worms
 **Sandfish**
* Lokalizacja: Płytkie wody w Dark Wolf hunting ground (również dostępne w Elden City)
* Uwaga: Najtrudniejsza ryba do złowienia — bardzo niska szansa na sukces
**Fish**
* Lokalizacja: Większość akwenów wodnych w Eloria
* Można złowić przy okazji innych ryb (np. Shimmer Swimmer, Rainbow Trout)
***
#### 🎁 Nagrody
* Losowe punkty **Reputation** (7–35)
* 10 **ELO points**
* **Reward & Task Tokens**
* **Wheel Scrolls**
NPC Salty Sam
# Elden Reputation - Kolekcjoner Przedmiotów
#### 📦 Misja: Zbieranie Przedmiotów
Udaj się do **Perceptor**, NPC znajdującego się na północ od DP w Elden City.\
👉 **Tip:** Skorzystaj z mapy — NPC jest dostępny po wejściu po drabinie.
Aby rozpocząć misję, powiedz:\
`hi → mission`\
Po zebraniu wszystkich wymaganych przedmiotów, zakończ misję:\
`hi → complete`
***
#### 🔹 Na czym polega misja?
Perceptor poprosi Cię o zebranie określonej liczby przedmiotów, które wypadają z różnych potworów.\
Poinformuje Cię również, z jakich potworów wypadają wymagane przedmioty, co ułatwi planowanie tras farmienia.
***
#### 🔹 Ważne informacje
* Wymagane przedmioty mogą wypadać z różnych potworów i w różnych lokalizacjach, więc przygotuj się na eksplorację.
* Misję można wykonać **raz na 24 godziny**.
***
#### 🎁 Nagrody
* Losowe punkty **Reputation** (7–35)
* 10 **ELO points**
* **Reward & Task Tokens**
* **Wheel Scrolls**
NPC Perceptor
# Elden Reputation - Alchemik
#### 🧪 Misja: Tworzenie Eliksirów
Odwiedź **Azoth Alchemist**, znajdującego się w Elden City, **Depot Level +1**.\
To Twój główny NPC do warzenia potężnych mikstur, które dają bonusy bojowe i użytkowe.
***
#### 🔹 Jak to działa
* Możesz stworzyć **jedną miksturę co 2 godziny**
* Każda wykonana mikstura daje **3–6 punktów Reputation**
* Nie są potrzebne żadne specjalne komendy — po prostu zbierz wymagane składniki i wybierz miksturę, którą chcesz stworzyć
***
#### 🔹 Dostępne mikstury i efekty
* **Arcane Catalyst** – +15 do poziomu Magii na 1 godzinę
* **Drunk Rune** – powoduje upojenie innego gracza na 30 sekund
* **Dust Collector’s Brew** – +150 Dust
* **Elixir of Vital Flow** – przywraca +300 HP i +300 MP co 3 sekundy przez 1 godzinę
* **Essence of Restoration** – natychmiast przywraca pełne HP i Mana
* **Phial of Immortality** – daje **nieśmiertelność** na 20 sekund
* **Warrior’s Tincture** – +15 do wszystkich umiejętności bojowych (Distance, Sword, Axe, Club, Shielding) przez 1 godzinę
NPC Azoth Alchemist
# Ring of Ending
#### 💍 Tworzenie Pierścienia Końca (Ring of Ending)
Tworząc **Ring of Ending** w klasyczny sposób — łącząc **String of Mending** + **Broken Ring of Ending** — otrzymujesz **0,25% szansy** na stworzenie najmocniejszego pierścienia na serwerze! 💍🔥
***
#### 🔹 Składniki
* **String of Mending** – wypada z:
* Pindleskin
* Sight of Surrender
* **Broken Ring of Ending** – wypada z:
* Yielothax
Niepowodzenie przedczas craftowania
Sukces! Pierścień został pomyślnie wykonany!
# Exaltation Forge - Kuźnia wzniesienia
### ⚙️ Kuźnia wzniesienia - System Knowergencji (Eloria OTS)
Exaltation Forge to jeden z najpotężniejszych systemów ulepszania w Eloria.\
Pozwala na **trwałe wzmacnianie sprzętu** i bezpieczne przenoszenie postępu między przedmiotami za pomocą funkcji **Convergence**.\
\
W przeciwieństwie do standardowego kowalstwa, Convergence **nie może się nie powieść**, co czyni go najbezpieczniejszym i najefektywniejszym sposobem ulepszania late-game gearu.
Exaltation forge & opcja Convergence
***
#### 💠 Co to jest Convergence?
Convergence to specjalna opcja w Kuźni, która pozwala:
* Przenosić postęp z jednego przedmiotu na inny tego samego typu i klasyfikacji,
* Łączyć dwa przedmioty tej samej klasy, zachowując wyższe bonusy,
* Bezpiecznie utrzymać postęp bez ryzyka utraty materiałów lub tierów.
Jest przede wszystkim używana do **przedmiotów Klasy 4** — czyli niestandardowego EQ na Elorii (przedmioty 1.2k/2.5k/3.5k/4k).
Classification 4 caption on Soulbleeder
Classification caption of custom Eloria items
***
#### 🧭 Jak uzyskać dostęp do Kuźni
**1. Dostęp przez Świątynię (klasyczny sposób)**
* Udaj się do **Thais Temple**, a następnie wejdź na **Adventurer’s Island** przez teleport po prawej stronie.
* Zejdź w dół i idź na północny-wschód. Po przejściu mostu znajdziesz **Exaltation Forge**, gdzie możesz korzystać ze wszystkich opcji Kuźni.
**2. Przenośna Kuźnia (Mobile Forge)**
* Można ją kupić w **Hunting Task Token Shop** w depocie Thais za 5,000 HTP.
* Pozwala używać Kuźni wszędzie, także podczas polowań — idealne dla graczy często ulepszających sprzęt.
***
#### 🔩 Podstawowe materiały do Exaltation Forge
Materiały tworzą prosty łańcuch:
* **Dust** → podstawowa waluta kowalska
* **Sliver** → ulepszony materiał do wyższych ulepszeń lub tworzenia Exalted Core
* **Exalted Core** → zaawansowany komponent do top-tier craftingu i przenoszenia tierów
**🔹 Konwersja materiałów (Eloria)**
* Slivery można bezpośrednio zamienić na Dust: 1 Sliver = 5 Dust
* Limit wymiany: maksymalnie 100 Dust\
💡 To czyni Slivery bardzo elastyczną walutą — przydatną do szybkiego uzupełnienia zapasu Dust.
***
#### ⚙️ Jak działa Convergence Fusion
1. Otwórz **Exaltation Forge** (Świątynia lub Mobile)
2. Wybierz opcję **Convergence**
3. Wybierz **Base Item** (przedmiot, który chcesz wzmocnić)
4. Wybierz **Donor Item** (przedmiot, który zostanie zużyty)
5. Potwierdź proces — **brak ryzyka niepowodzenia**
* Rezultat: Twój base item dziedziczy **wyższy tier** (większa szansa na trigger buffa)
Convergence Fusion
***
#### ⚙️ Jak działa Convergence Transfer
1. Otwórz **Exaltation Forge** i przejdź do zakładki **Transfer** → wybierz **Convergence**
2. Wybierz **Item**, z którego chcesz przenieść tier (zużywany)
3. Wybierz **Target Item**, na którym chcesz dodać tier
4. Potwierdź proces — **bez ryzyka niepowodzenia**
Rezultat: target item dziedziczy tier z konsumowanego przedmiotu (zużywa go)
Covergence Transfer
***
#### 💎 Zwiększanie pojemności Dust
* W Eloria możesz zwiększyć pojemność Dust w Kuźni do **160 Dust**, co usprawnia crafting i transfery
* Pozwala to przenosić i ulepszać wszystkie tier-y (1–2, 4–5, 9–10) bez przerw
* Zapobiega brakom miejsca podczas multi-tier Convergence
***
#### 🛡️ Buffy z Tiera i ich efekty
Każdy slot przedmiotu daje unikalne pasywne bonusy w miarę podnoszenia tieru.\
💡 Wyższe tiery zwiększają skuteczność bonusów i szansę ich aktywacji.
| Item | Bonus Type | Description |
| ---------- | ------------- | ------------------------------------------------------------------------------------------------------------------------------------------------------------------------------------------------------------- |
| **Weapon** | Onslaught | Dodaje szansę na trafienie krytyczne – 60% dodatkowych obrażeń. |
| **Armor** | Ruse | Dodaje szansę na uniknięcie obrażeń. |
| **Helmet** | Momentum | Co dwie sekundy, gdy wskaźnik walki jest aktywny, dodaje szansę na skrócenie czasów odnowienia o 2 sekundy; dotyczy indywidualnych czarów oraz drugiej grupy czasów odnowienia – nie wpływa na pierwszą grupę |
| **Legs** | Transcendence | Daje szansę na przemianę w Awatara Poziomu 3 na 7 sekund po wykonaniu ataku. |
💡 **Wyższe poziomy (tiery) wzmacniają te premie, zwiększając jednocześnie szansę na ich aktywację.** ✅
Przedmioty z tierami i ich premie
***
#### 🧠 Wskazówki i najlepsze praktyki
* Skup się na **przedmiotach Klasy 4** — są trwałe i przenoszalne
* Konwertuj nadmiar Sliverów na Dust, aby być zawsze gotowym do forge’u
* Kup Mobile Forge wcześnie — opłaca się dla aktywnych graczy
* Zwiększ pojemność Dust do 160 dla płynnego craftingu
* Nie demontuj duplikatów Class 4 — są nieocenione przy Convergence
# Lokalizacje Bossów
### 👑 Lokalizacje Bossów – Odkryj Najpotężniejsze Istoty Elorii
W krainach **Elorii** czekają pradawne istoty, skażone duchy i potężni władcy wojny — gotowi stawić czoła tylko najodważniejszym poszukiwaczom przygód.\
Każdy boss skrywa nie tylko **unikalne skarby**, lecz także **klucz do postępu w Bestiariuszu i Bosstiariuszu**, wzmacniając Twój **bonus do ekwipunku** oraz **efektywność Charmów**.\
Pokonanie tych przeciwników jest niezbędne, by w pełni **opanować endgame Elorii**.
### Fleshslicer
Path to Fleshslicer
### The Ravager
Path to The Ravager
### Bragrumol
Path to Bragrumol
### Lisa
Path to Lisa
### Glooth Fairy
Path to Glooth Fairy
### Bullwark
Path to Bullwark
### Ancient Spawn of Morgathla
Path to Ancient Spawn of Morgathla
### The Abomination
Path to The Abomination
### The Frog Prince
Path to The Frog Prince
### Oskayaat is drowning in the Boss Amount...
### Big Boss Trolliver
### Fleabringer
### Mornenion
### Robby the Reckless
### Elvira Hammerthrust
Path to above Oskayaat Bosses
### Smuggler Baron Silvertoe
Path to Smuggler Baron Silvertoe
### Groam
Path to Groam
### Xenia
Path to Xenia
### Willi Wasp
Path to Willi Wasp
### Zomba
Path to Zomba
### General Murius
Path to General Murius - Mintwallin
### Hairman The Huge
Path to Hairman The Huge
### Barbaria
Path to Barbaria
### Yaga the Crone
Path to Yaga the Crone
### Elf Overseer & Dharalion
Path to Elf Overseer and Dharalion
### Rukor Zad
Path to Rukor Zad
### White Pale
Path to White Pale
### Rotworm Queen
Path to Rotworm Queen
### The Percht Queen
Path to The Percht Queen
### The Blightfather
Path to The Blightfather
### The Evil Eye
Path to The Evil Eye
### Man in the Cave
Path to the Man in the Cave
### Hirintror
Path to the Hirintror
### Grandfather Tridian
Path to the Grandfather Tridian
### Warlord Ruzad
Path to the Warlord Ruzad
### Diblis The Fair
Path to the Diblis The Fair - Nargor
### Zevelon Duskbringer
Path to the Zevelon Duskbringer - Hellgate
### Arachir The Ancient One & Gravelord Oshuran
Path to the Arachir The Ancient One & Gravelord Oshuran - Drefia Vampire Hell